
June 14, 2026
The Diopter & Objective Focus, NUC Fix & Blurry Image Fix – How to Focus a Thermal Scope
There are several ways a thermal scope can be "soft", and only one of them is lens focus. Before you assume that it’s a problem with the sensor, display, mount or brand, it’s useful to distinguish between the jobs that the diopter is doing and the objective is doing, and how NUC/calibration and image settings affect the display of the contrast.
In my field experience, the majority of blurry thermal scope complaints are a setup problem, environmental problem, and/or an expectation problem. A hunter with a new scope stands out over a warm pasture, zooms in, adjusts all the image settings to their maximum, and concludes that something must be wrong with the scope because the image isn’t that of a polished Scope Shop promo clip. At times the scope is good. Occasionally conditions are not favourable. At other times the diopter is never properly adjusted.
This guide will show you how to focus a thermal scope in a practical order, how to determine if a thermal scope image is blurry, and when it is not focus at all.
The Short Version
- The first adjustment is the thermal scope’s diopter adjustment to make the reticle, menu text and display icons clear to you.
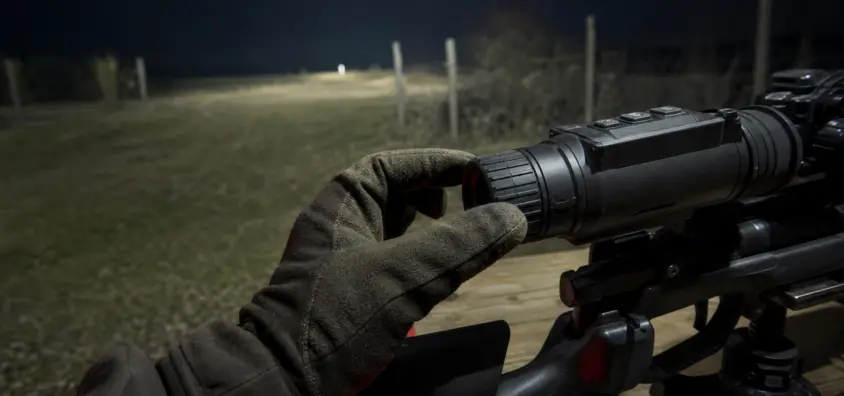
- Adjust actual target distance using thermal scope objective focus or front focus ring.
- If the image appears to be a bit uneven, smeared or slightly "frozen", perform a NUC or calibration as directed in your manual.
- Brightness, contrast, gain, sharpness and palette were adjusted post focus and post NUC.
- If it is sharp, reticle with soft animal, then objective focus, distance, humidity, sensor limits or digital zoom are involved.
- Soft reticle or soft menu – diopter, eyepiece position or your eye relief is off.
- Grain, sparkle and noise do not equal blur. A thermal scope can be noisy even if it is focused.
- Even the best optic can look flat with warm, humid nights and thermal crossover.
- Digital zoom does not add detail. It enlarges the pixels already available.
- Always verify target identification, establish a backstop, abide by local law and maintain a realistic identification range.
Why Thermal Scopes are Blurry When There is No Problem
Thermal imaging isn’t seeing through glass. A thermal rifle scope uses a lens to gather infrared energy, converts the data into a sensor image, processes it, and displays it on a diminutive screen. All of these links in the chain can impact on apparent sharpness.
Hence, the image quality of the thermal camera is not solely determined by the focus ring. Lens size, sensor resolution, display resolution, NETD, base magnification, digital zoom, weather, humidity, firmware processing, palette, gain, contrast and your own diopter setting all make a difference.
More detailed background information about sensors is available through NV Guide USA’s guides on thermal sensor resolution and 384 vs 640 thermal scopes. This article remains within the realm of field troubleshooting – what to tweak first and what each tweak can really correct.
Thermal Image Blur vs Grain vs Low contrast
Blur is when the edges are not clearly defined. Grain: Noisy, sparkly or crawling image. Low contrast indicates that the animal, ground, brush and background are too similar in temperature to differentiate.
Those are other issues.
A target that is blurry at 75 yards could just require objective focus. When scope is adding gain in poor conditions or sensor/display combination is showing noise, thermal scope doesn’t look blurry, but grainy. An "under" exposed photo taken on a warm, humid night may just be low thermal contrast, it does not necessarily mean a bad focus job.
This difference is important because not all of the unsightly pictures can be corrected by rotating the focus ring. It will enhance the thermal scene at a certain distance but it won’t generate any temperature contrast that doesn’t exist.
Why Buyers Can Be Misled with Store Demos and Recorded Footage
Demonstrations are often conducted indoors at close range using highly contrasting subjects such as hands and faces, HVAC vents, warm electronics, or people moving against cool walls. Video footage can be recorded, compressed, watched on a bigger screen or captured under ideal circumstances.
The field of view through the eyepiece is different. With your eye you are looking at a small display that shows your Diopter setting, your brightness level, the weather, the distance, your shooting posture. The reason for this is that a phone recording may appear sharper than what the eyepiece sees, as the phone is viewing it in a different way.
Don’t only rely on clips from the internet to decide on a thermal scope. Evaluate it after proper diopter setting, objective focus, NUC and realistic settings and field conditions similar to those you hunt.
How Weather, Humidity, and Thermal Crossover Affects the Picture
Thermal scopes require a contrast in temperature. The separation between ground, brush, trees, rocks, fences and animals is lost if the temperature is similar. This is typical during thermal crossover, typically around times the environment is warming or cooling by the same temperatures.
The quality of the thermal scope humidity image can also plummet. Humid air decreases contrast, and flattens the scene. A good scope can look less good on a humid summer night in thick cover than it does on a dry cold night in open terrain.
That’s why one night your scope will look great and another night, it won’t. This focus was not necessarily a change. The environment did.
Diopter vs Objective Focus: Two Adjustments Hunters Get Wrong
Using the wrong control for the wrong job is the most often encountered error. Hunters will rotate the thermal scope focus ring, the eyepiece, settings, NUC and forget to change what they did.
Use the changes as individual tools.
The Diopter corrects for any errors in refractive error.
The diopter adjusts the eyepiece/display to your eye. It should provide sharp resolution for the reticle, the text of the menu, icons, the battery gauge, and the status. Do not pick up on a coyote at 180 yards or a hog next to a feeder.
When it comes to how to adjust diopter on thermal scope models in general, it’s quite simple: find the display information and dial the diopter until you see sharpness in both the reticle and the menus. Use the precise control position specified in the manual; eyepiece designs vary.
After the diopter is adjusted to your eye, do not adjust it again until another shooter uses the scope, your eyeglasses or contacts change, or the position of your eyes changes significantly enough to affect the adjustment.
This objective focus adjusts for what?
Objective focus is for distant thermal scenes. This is a front focus ring around the objective lens on many scopes. On smaller models, the focus can be set, simplified or managed differently. The manual wins.
Thermal scope objective focus is according to distance. The feeders at 60 yards, the wood line at 150 yards, and the coyotes crossing an open field at 300 yards won’t all be as crisp at the same setting. The bigger the lens the more magnification and the more critical the focus will be.
Reticle Sharp but Target Blurry: What Does It Mean?
Objective focus, distance, NUC and conditions are the first steps of thermal scope troubleshooting if the reticle is clear but target is blurry. The display is crisp at your eye and the diopter is likely near. The next question is: Is the thermal scene focused, and is there sufficient detail in the scope for the specific target, range and weather?
It’s also where you will see unrealistic identification expectations. Detection, recognition and identification are NOT the same. Heat sightings are not equal to actual sightings of an animal. This is explained in more detail in the NV Guide USA guide to thermal detection, recognition and identification distances.
Target Looks Better but Reticle/Menu Is Soft: What It Means
If the animal appears to be in good shape, but the blurry reticle in the thermal scope continues, then inspect the diopter. The goal could be working with a screen that your eye is not viewing clearly.
Testing eye relief and head position also. A screen is visible in an eyepiece. Your eye position is too far forward, too close, off-center, or straining behind the scope; the image may appear uncomfortable when the scope is operating normally.
Infrared Scopes in Use Step by Step
Use this order before playing for advanced settings. It prevents you from fixing the same issue three ways.
Step 1 – Begin in a Safe and Realistic Observation Environment
Set up in a location that is similar to where you will be using the scope. When hunting hogs near feeders pay attention to feeder-distance objects and brush in the area. When hunting coyotes in open fields, consider adding longer distances and field edges. When shooting with a weapon mounted scope remember the rules of firearm safety, use a safe direction, and know your backstop.
Not to use focus testing as an excuse to point a rifle at something that you have not identified or are not willing to cover with the muzzle. Be sure to confirm identity of target, adhere to local laws and maintain high standards for ethical identification, which are above the level of only heat detection.
Step 2 – Focus the Diopter to make the Reticle and Menu Text Clear
Display menu or reticle and icons. For now forget about the target scene. Use the "diopter" until it’s clear and easy to read.
If glasses or contacts are worn while hunting, set the dioptric to that level. If the rifle is transferred to another shooter, the shooter may need to recalibrate the rifle. A shared thermal can be blurry just because the previous person adjusted the eyepiece to their eye.
Step 3 – Set Objective to Actual Target Distance
Next, focus the real-world scene using the thermal scope objective focus. Choose an object at a distance that is significant: a feeder leg, a fence post, a tree trunk, a berm, a steel target or animal shaped heat source at a safe distance.
Slowly rotate the focus. At higher base magnifications, a small window often is a good focus. Don’t consider just the hottest ‘blob’. Observe for definition of edges: legs, ears, brush edges, fence lines, separation of target from background.
If the image looks uneven, then proceed to step 4 to run NUC or Calibration.
NUC is an acronym for non-uniformity correction. Simply put, it smooths out the sensor response, resulting in an image that isn’t streaky or patchy, as if it was frozen, or textured in an artificial way.
Thermal scope NUC explained simply: focus changes sharpness; NUC/calibration cleans up sensor uniformity. For more information about when to NUC a thermal scope read NV Guide USA’s guide to thermal NUC and why your scope clicks.
Step 5 – Last: Brightness, Contrast, Gain, Sharpness, and Palette
Adjust image settings after diopter, objective focus and NUC. This is where many users get in trouble. They adjust sharpness, brightness or contrast to compensate for poor focus, which then results in a harsh, noisy or blown out image.
Thermal scope brightness contrast gain settings should be made to assist, not oppose, conditions. If you need it, sharpness can make the edges look better, but don’t go overboard or the noise can look like detail. The palettes can assist your eye in interpreting the scene, but no palette can form identification detail in itself.
See NV Guide USA’s guide to thermal scope settings, gain, contrast, brightness, sharpness and zeroing profiles for a more in-depth breakdown of settings.
Repeat Step 6 – Recheck Focus When Distance or Conditions Change
The thermal rifle scope focus is not a "one size fits all" process for each hunt. When converting from a 50 yard feeder to a 250 yard field edge, re-check objective focus. Recheck NUC and settings if humidity increases, fog rolls in, or if there is a ground temp change.
The idea is not to play with it all the time. The idea is to understand which control is key when the image is changing.
Typical Thermal Scope Blurry Picture Issues and also Services
The Reticle Is Sharp but the Animal Looks Soft
This typically indicates objective focus, range, low contrast or sensor/lens limitations. Set to the true distance. If the image is not even, run NUC. If you feel you’re losing detail, back off the digital zoom and evaluate the animal at base magnification.
Menu and reticle are blurry.
Always begin at the diopter! Next look at eye relief, display brightness and position your head behind the stock. If the menu is soft, don’t continue to adjust the front lens. The front lens will not make the display text clear.
The picture appears grainy, sparkly or noisy
Not all noisy images are out of focus. This can be due to low signal, high gain, aggressive sharpness, poor conditions or simply the limit of that sensor/display combination. Experiment with NUC, medium gain and sharpness and compare the image to a higher-contrast object.
The Image Looks Washed Out in Warm or Humid Weather
This is common. Low temp separation and warm wet air make for less contrast. Fine tune the contrast/gain and experiment with other palettes and be aware that the detail may be lost due to humidity and/or thermal crossover even when focus is correct.
Looks Good at 100 Yards, Falls Apart on Digital Zoom.
Thermal scope blurry is typically regarding pixel enlargement. Digital zoom is a magnification of the image, but it won’t increase the sensor resolution. Digital zoom can be used to give the camera a 2x or 4x magnification view to help target the image, but the magnification may cause the image to look blocky.
NV Guide USA elaborates on the compromise in the guide on thermal scope magnification, base magnification and digital zoom.
It’s the same scope that was good last night, but bad tonight.
Always check conditions rather than the scope. Humidity, wind, rain, vegetation and animal / background contrast can vary greatly. Re-run NUC, recheck focus at distance and compare several objects before deciding that there is a fault with the optic.
The picture is clear on a phone recording but not via the eyepiece.
That typically refers back to diopter, eye relief, brightness of the display or your eye position. The recording is not in your eye! Test the scope at your "shooting height" and adjust the eyepiece to suit your eyesight.
What NUC, Calibration and Focus really do to fix!
Imagine that the focus, NUC and settings are three layers.
- Diopter: sharpens the screen, reticle and menu to your eyes.
- Objective focus: makes the thermal scene sharp at a chosen distance.
- NUC/calibration: compensates for non-uniformity of the sensor and unevenness of the image.
- Settings: How the image you’ve processed looks to your eye.
A bad diopter will not be corrected by thermal scope calibration. Objective focus will not correct non-uniformity in the sensor. Changing sharpness settings will NOT change a low resolution image into a high resolution image.
This is where the order can make a difference. Look at the eye first, focus second, make calibration adjustments when the image requires it and then settings adjustments.
Focus and settings under various hunting situations
Hog Hunting/Feeders and Brush
Hog hunting focused on thermal scope is typically done at a known distance such as feeders, senderos, field edges, bait sites or brush openings. If you are likely to have to shoot between 60 and 120 yards, aim for that range and look at the brush separation from animals.
Here, field of view is important since hogs seldom stand alone. See NV Guide USA’s guide to thermal scopes field of view for hog and coyote hunting for setup options and check out the current guide to thermal scopes for hog hunting.
Coyote hunting in open fields is allowed.
Coyote hunting with a thermal scope camera can increase the importance of range, ID and contrast. It is important to note that when a coyote is at range, it may be detected before it can be identified responsibly. Scan likely approach areas, but don’t be tempted to run at a ‘hot shape’ rather than identify.
If you’re looking for more information about the optics, there is a thermal scope guide for coyote hunting on NV Guide USA.
Thermal scope setups for the AR-15 are available.
You’re going to require a repeatable head position for an AR-15 thermal scope setup. A cheek weld may feel different each time you shoulder the rifle, which is why the eyepiece might feel different even with the diopter adjusted. Comfort is influenced by mount-height, stock position, eye relief, and display brightness.
Be sure that the objective focus ring is easily accessible from your shooting or scanning position. If the ring to focus on is inconveniently placed in the dark, it’s a problem in the field, regardless of whether the scope will produce a sharp image or not.
The advantages of a tripod scanner over weapon mounted use are also outlined.
Tripod Scanning is not the same job as weapon mounted aiming. A scanner can be configured for viewing and rapid scan of the terrain. In addition to being accurate, safe, and reliable, a weapon-mounted thermal must allow for safe muzzle direction, stable shooting position, visibility of the reticle, and positive identification prior to firing.
When scanning with the rifle, have particular discipline as to where the muzzle is pointing. The thermal optic doesn’t alter firearm safety guidelines.
What Focus Can’t Fix
There is a lot more that focus can’t fix than what buyers hope it can fix.
It can’t compensate for poor humidity or heavy fog or thermal cross over. It does not support the addition of sensor resolution. It can’t transform digital magnified images into true optical images. It can’t turn a low resolution display into a high resolution display. It cannot gather the same detail from a scene under the same conditions as a larger lens, using the same small lens.
See NV Guide USA’s articles on Thermal scope display resolution, Thermal scope size and Thermal for more information on related purchasing expectations.
Avoid the use of analog night vision habits with thermal devices. If you’re comparing the two systems, NV Guide USA has a separate guide on how to focus night vision.
But also, focus can’t take the place of judgment. If you don’t know what animal you are taking a shot of and what is behind it, you’re not prepared to take a shot.
Before blaming the scope, go through the following checklist:
- Check that the lens is clear, that the objective cap is open.
- Use diopter to set, using reticle and menu text, not target scene.
- Set the objective at the true distance you are interested in.
- If the image looks uneven, streaky or smeared, run NUC/calibration.
- Switch back to the base magnification and compare detail.
- Decrease extreme sharpness, brightness, contrast or gain levels.
- Monitor humidity, fog, rain, thermal crossover and background temperature.
- Measure and compare some objects at known distances.
- Reinspect eye relief, cheek weld and display position behind the rifle.
- Don’t hunt until you detect it first and recognize/identify it later.
Quick FAQ
- Why is the image on my thermal scope blurry? It is usually due to a misaligned diopter, an improperly focused objective, NUC/calibration, aggressive settings, digital zoom, humidity, or unrealistic ranges.
- How to clear up a thermal scope image? Set the diopter first, focus the objective at distance of target, run NUC if necessary, tune brightness, contrast, gain, sharpness and palette conservatively.
- When is it time to NUC a thermal scope? NUC when the image appears uneven, frozen, streaky or smeared, or after conditions have changed. Please follow your manual as automatic and manual NUC behavior is different.
- Why can’t you see the target clearly, but you can see the reticle clearly? This could be due to objective focus, distance, conditions, digital zoom, or sensor/lens limitations.
Bottom Line
The instructions on how to focus the thermal scope are, for the most part, about the proper order of adjustment. Adjust the diopter to make the reticle and menu clear to the eye. Adjust the objective focus ring to bring the thermal picture to a sharp focus at the distance of interest. If the image is uneven, run NUC. Once the basics are right, tweak the brightness, contrast, gain, sharpness and palette.
If the picture is still not good, consider other factors than focus. What you see is dependent on the weather, humidity, thermal crossover, digital zoom, display resolution, sensor resolution, lens size, and distance of identification.
Even a good thermal scope has its inherent limitations, depending on the physics and circumstances. For the right goal, perfect marketing image isn’t always the right answer. A clear enough picture, at a safe enough distance, with enough confidence in the identification to make a safe and ethical decision in the field, is the right goal.
IR Illuminator Not Working With Night Vision? Beam, Battery, Focus and Compatibility Check.
Is your NV not turning on? Battery, Contacts, Mount and Tube-Safe Troubleshooting
Night Vision Collimation and Alignment: Fix Double Vision, Eye Strain and Dual-Tube Setup Issues