
Night Vision Technology: How It Works — Complete Guide
Most people shopping for night vision focus on price and brand. That makes sense. But if you don’t understand what’s inside the device, you’ll either overpay for specs you don’t need or buy the wrong thing entirely. This guide explains the technology — plainly, without the physics textbook. Once you get it, buying decisions get a lot cleaner.
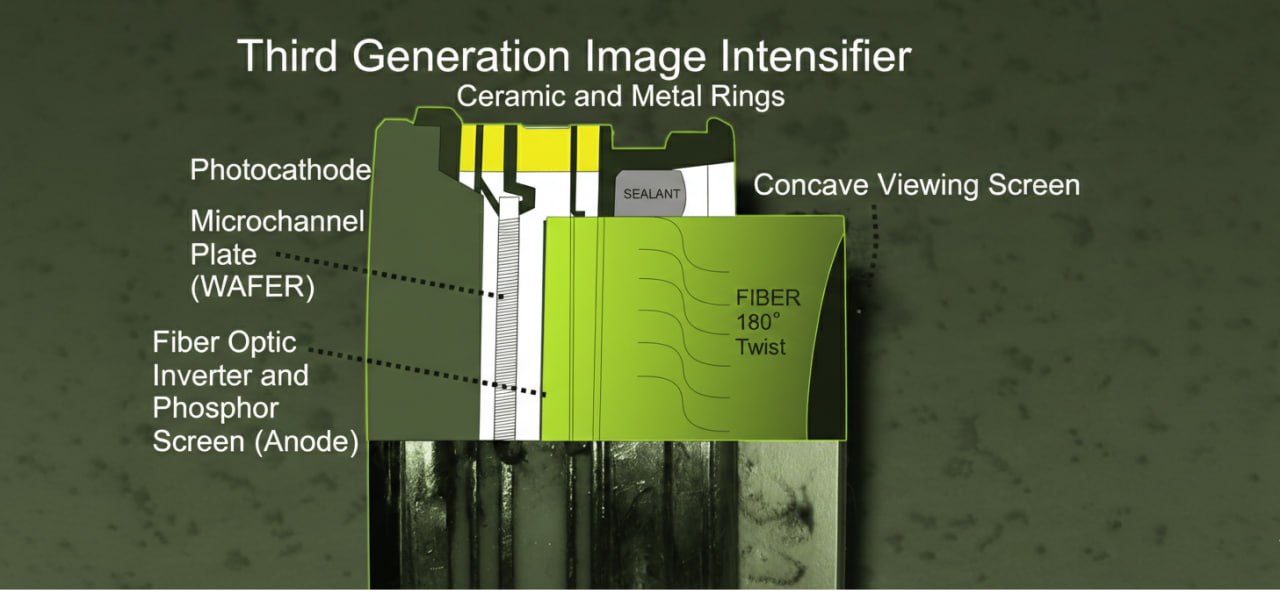
How night vision works: the image intensifier tube
Traditional night vision — the kind used by military and law enforcement — doesn’t take photos and process them digitally. It amplifies actual light in real time, through a vacuum tube called an image intensifier tube (IIT). The process happens in four steps.
Step 1: Light enters through the objective lens. Even on a dark night, there’s ambient light — starlight, airglow from the upper atmosphere, moonlight. A Gen 3 tube can operate passively at roughly 0.002 lux, which is overcast starlight. That’s dim enough that your eyes see almost nothing.
Step 2: The photocathode converts photons to electrons. Light hits a thin semiconductor layer inside the tube. Photons knock electrons loose — this is the photoelectric effect. The critical thing here is that the electron pattern preserves the spatial layout of the image. Brighter areas produce more electrons; darker areas produce fewer. The photocathode material determines how efficiently this conversion happens. Gen 1 tubes use a basic multi-alkali photocathode. Gen 3 uses gallium arsenide (GaAs), which has dramatically higher quantum efficiency, especially in the 700–900nm near-infrared range.
Step 3: The microchannel plate multiplies the electrons. This is the part that changed everything when it was introduced in the 1970s. The MCP is a glass disk about 1–3mm thick, packed with millions of microscopic channels — each around 8 micrometers wide. An electron enters a channel, hits the wall, and knocks out secondary electrons. Those hit the wall again, releasing more. By the time it exits, one electron has become 10,000 to 100,000 electrons. Think of it as a hall of mirrors for electrons: one bouncing input becomes a cascade.
Step 4: The phosphor screen converts electrons back to light. High voltage (800–1,200V) accelerates the electron cloud into a phosphor-coated screen. The phosphor emits visible light proportional to electron density — reconstructing the original image, but now bright enough to see clearly. Green phosphor (P-43) has been the standard because the human eye is most sensitive to that wavelength. White phosphor (P-45) produces a black-and-white image, which handles contrast differently.
The complete chain: photons → photocathode → electrons → MCP (×10,000–100,000) → phosphor screen → eyepiece
Latency across this chain is negligible. Electrons travel fast. This is why analog IIT is preferred for tactical use over digital systems, which introduce 30–100ms of lag.
Night vision generations
The generational labels are a rough taxonomy of major technology jumps. They’re useful shorthand, but they get abused in marketing — so it’s worth knowing what actually changed at each step.
Specifications sourced from manufacturer data sheets and authorized dealer listings. Specs may vary by production batch. Verify before purchase.
| Generation | Introduced | Photocathode | MCP | FOM range | Resolution | Lifespan | Civilian price |
|---|---|---|---|---|---|---|---|
| Gen 1 | 1960s | S-1/S-20 multi-alkali | No | N/A | 24–42 lp/mm | ~1,500 hrs | $200–$1,500 |
| Gen 2 | 1970s | S-25 multi-alkali | Yes | 500–1,200 | 32–45 lp/mm | 2,500–5,000 hrs | $500–$2,000 |
| Gen 2+ (Photonis) | 1980s–90s | Advanced S-25 | Yes (improved) | 1,400–2,500 | 60–72 lp/mm | 2,500–5,000+ hrs | $1,800–$4,000 |
| Gen 3 (filmed) | 1980s | GaAs | Yes + ion barrier film | 1,400–2,200 | 57–68 lp/mm | 10,000+ hrs | $2,500–$5,000 |
| Gen 3 Filmless | Late 1990s | GaAs | Yes, no ion film | 1,800–3,000+ | 64–81 lp/mm | 10,000+ hrs | $3,200–$6,500+ |
Last updated: February 2026. Gen 3 tube specifications (FOM, SNR, lp/mm) are minimum guaranteed values; actual performance varies per individual tube.
Prices are approximate as of early 2026 and vary by tube grade, dealer, and availability. Always confirm current pricing before purchase.
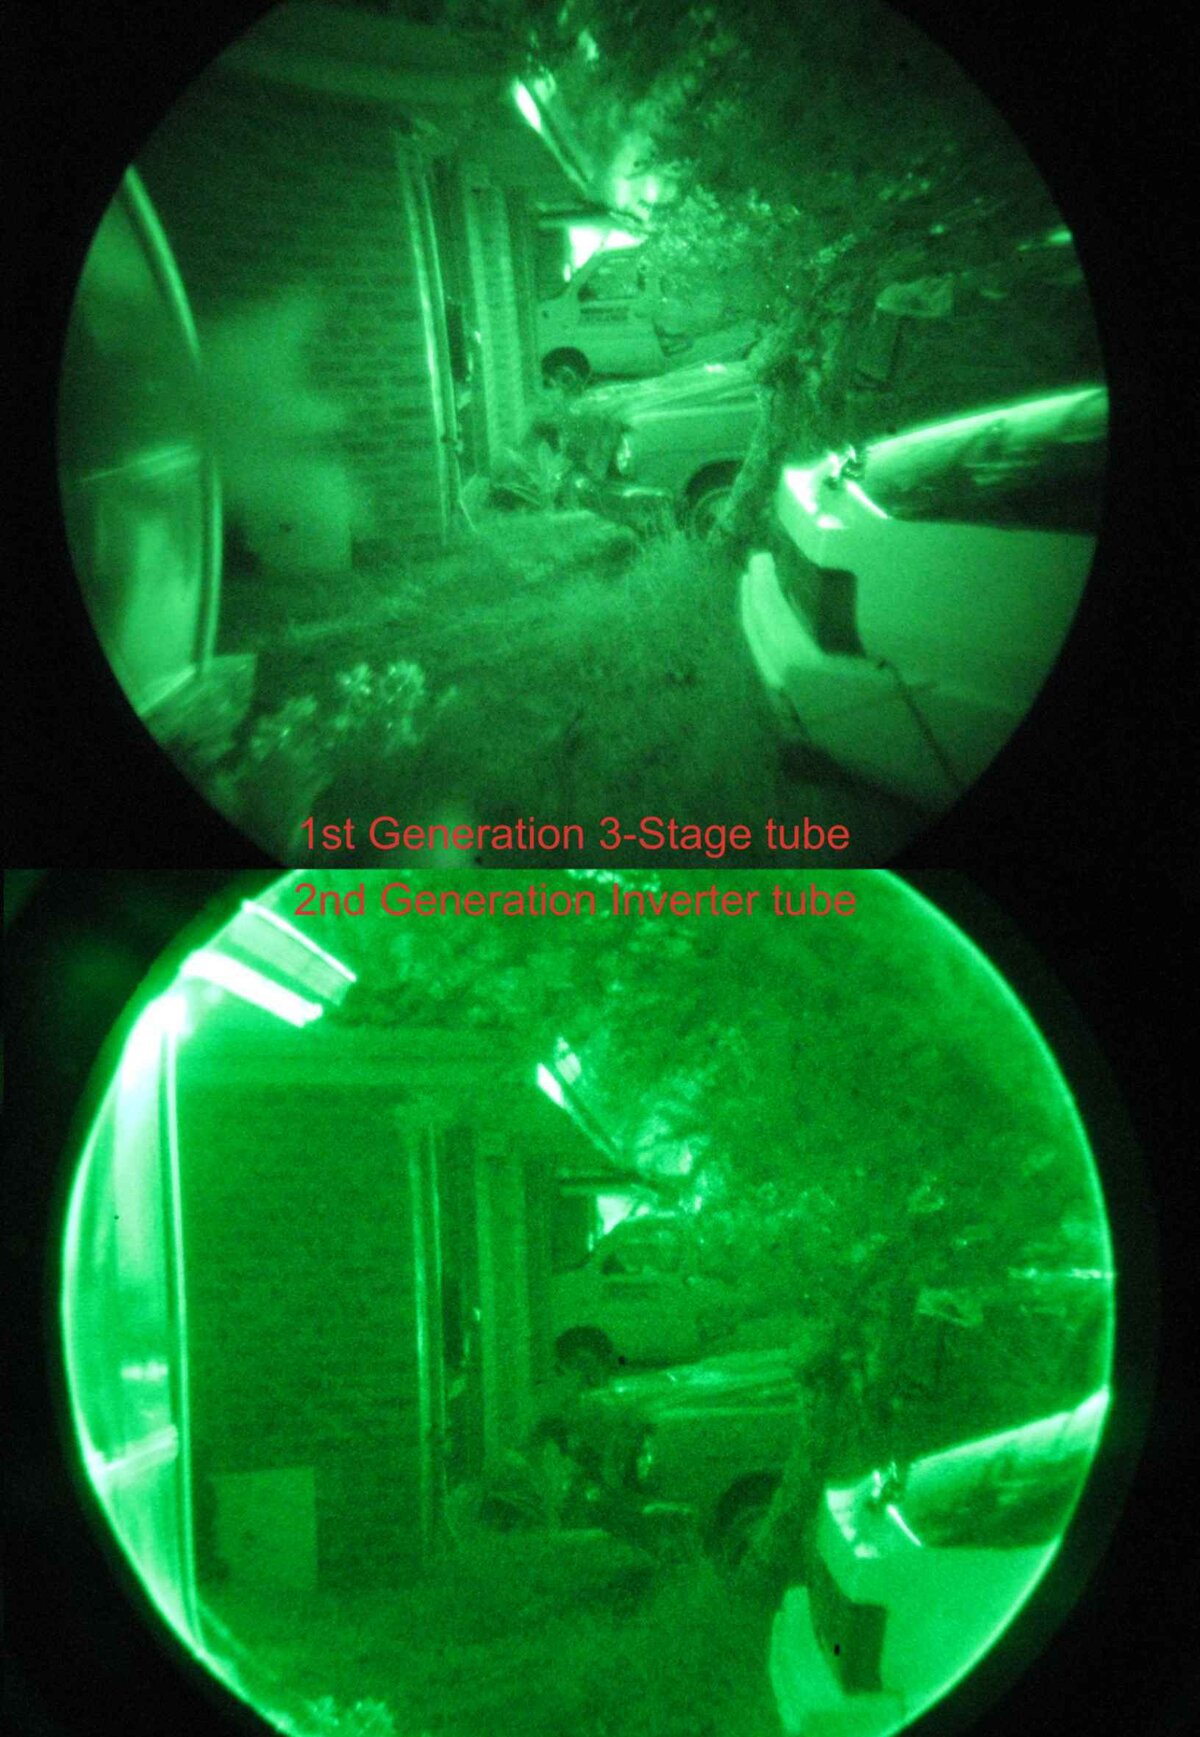
Gen 1 works without an MCP — electrons are accelerated directly from photocathode to phosphor screen. Gain is around 1,000×, and the images show barrel distortion at the edges. Effective range is roughly 75 yards. Recreational use only.
Gen 2 added the microchannel plate. That single change pushed gain to 20,000–30,000× and effective range to around 200 yards. Less distortion. The tube can operate passively in moonlight or starlight without an IR illuminator. L3Harris started manufacturing 18mm Gen 2 tubes in Tempe, Arizona in 1976.
Gen 2+ / Photonis SuperGen is a European development track, not the same as American Gen 3. Photonis (now Exosens) stayed with advanced multi-alkali photocathodes but improved the MCP design significantly. Top-tier Photonis 4G tubes reach FOM 2,200+ and gain of 86,000 — competitive with mid-grade Gen 3 in most practical conditions. They’re not ITAR-restricted, which matters for export. The gap versus American Gen 3 shows up mainly in extreme low light.
Gen 3 (filmed) switched to a gallium arsenide photocathode. GaAs has dramatically higher quantum efficiency in the near-IR range where most night vision is used. The tube also added an ion barrier film on the MCP — a thin aluminum oxide layer that prevents positive ions from drifting back to the photocathode and degrading it. This extended tube lifespan to 10,000+ hours.
Gen 3 Filmless removes that ion barrier film. Without it, electron throughput increases — which means better gain, better SNR, and reduced halo around bright lights. The downside: ions can backstream and damage the photocathode. The fix is auto-gating — the tube power cycles at 60–1,000 Hz, fast enough to eject ions before they cause damage. L3Harris started unfilmed Gen 3 development in 1998. This is the current top of the civilian and military market.
Key specs explained
Spec sheets can look like random strings of numbers. Here’s what each one actually tells you.
FOM (Figure of Merit)
FOM = SNR × center resolution (lp/mm). It’s a single number meant to summarize tube quality. A 2,200 FOM tube is generally better than a 1,600 FOM tube. But here’s the problem: the same FOM can mean very different things.
- 27 SNR × 81 lp/mm = 2,187 FOM (sharp detail, struggles in pitch black)
- 34 SNR × 64 lp/mm = 2,176 FOM (less detail, much better in extreme darkness)
Same FOM. Very different tubes. If you hunt dense dark woods, the high-SNR version matters more than the high-resolution one. FOM is a useful starting filter, not a final answer.
SNR (Signal-to-Noise Ratio)
SNR measures how much of what you see is actual image versus random electron noise — the grainy “snow” effect. Higher SNR means a cleaner picture in low light. Mil-spec minimum for Gen 3 is 25. Duty grade runs 25–28. High-performance tubes reach 28–33. Select aviation-grade tubes exceed 33.
EBI (Equivalent Background Illumination)
EBI measures the glow the tube produces on its own in total darkness — with no light input at all. Lower is better. A high-EBI tube has a bright background that competes with faint details. Gen 3 mil-spec EBI runs 1.7–2.5 (×10⁻¹¹ lm/ft²). Photonis tubes typically have EBI below 0.25 — better on this metric than most Gen 3.
Resolution (lp/mm)
Center resolution is how many line pairs per millimeter the tube can resolve on a test pattern. Gen 3 mil-spec is 64–68 lp/mm. High-performance tubes reach 68–72 lp/mm. Select tubes go up to 81 lp/mm. Edge resolution is always lower — roughly 40–60% of center.
Halo
The bright ring around light sources — streetlights, vehicle headlights, muzzle flash. Measured in millimeters; smaller is better. Budget Gen 3 can show halos over 1.0mm. Good mil-spec tubes: 0.85–1.0mm. Filmless Gen 3: often below 0.7mm, because the ion barrier film was a significant contributor to halo.
White phosphor vs green phosphor
Green phosphor (P-43) has been the standard for decades because the human eye’s peak sensitivity is around 555nm — green. White phosphor (P-45) produces a broader spectrum output that looks like black and white.
The practical difference: black-and-white imagery gives the brain better contrast cues for distinguishing edges, shapes, and textures in complex environments. Aviation testing showed reduced eye fatigue over extended use with white phosphor. L3Harris began developing high-FOM white phosphor tubes in 2014.
White phosphor costs more — typically $400–$800 more per device. For hunting and general outdoor use, most users who switch don’t go back. For short-duration use in simple environments, the difference is real but not always decisive.
See the detailed breakdown: White phosphor vs green phosphor — practical guide
Thermal imaging: how it’s different
Thermal doesn’t amplify light at all. It detects heat — specifically, the infrared radiation emitted by every object above absolute zero. On a cool night, a warm body stands out from the environment whether there’s a moon or not, whether the woods are dense or open.
How a thermal sensor works
The sensor is a microbolometer — an array of pixels made from vanadium oxide or amorphous silicon. Each pixel absorbs incoming long-wave infrared radiation (8–14 micrometers wavelength). That absorption causes a tiny temperature change — as small as 0.01°C — which changes the pixel’s electrical resistance. The camera reads those resistance changes and maps them to a temperature image. No lenses, no tubes, no photons of visible light.
Key thermal specs
NETD (Noise Equivalent Temperature Difference): The smallest temperature difference the sensor can reliably detect. Measured in millikelvin (mK). Budget thermal units run 70–100 mK. Mid-range like Pulsar Thermion or FLIR Scout: 40–70 mK. Premium units reach 20–40 mK. Lower is better.
Pixel pitch: The size of each detector pixel. 17 micrometers was the standard for years — larger pixels capture more infrared, so sensitivity is higher. 12 micrometer sensors are now common; they allow smaller, lighter devices with the same resolution array. Modern 12μm sensors with improved processing match 17μm in NETD for most conditions.
Array size: 320×240 for budget units, 384×288 for mid-range, 640×480 for premium. More pixels means more detail at range.
What thermal can’t do
Thermal cannot see through glass — a window blocks LWIR entirely. It cannot read text at range. It cannot distinguish between two objects at the same temperature. In rain or heavy fog, performance degrades. And unlike analog IIT, thermal has 33–100ms of display latency.
Thermal is best for detection — finding animals, people, or heat signatures in darkness or through light vegetation. Analog NV is better for identification and navigation. Many serious users run both: thermal for scanning, NV for positive ID.
Brands: Pulsar, FLIR/Teledyne, AGM Global Vision. Price range: $800–$8,000+.
Digital night vision
Digital NV uses a CMOS sensor — the same basic technology as a digital camera — combined with a built-in IR illuminator. The sensor captures near-infrared light, processes it digitally, and displays the result on an OLED or LCD screen.
Advantages: Lower cost than tube-based systems. Native video recording. Daylight use is possible (with IR filter). Feature-rich options from ATN — the ThOR and X-Sight lines include WiFi streaming, GPS, ballistic calculators, and rangefinders. Longer device lifespan since there’s no tube to degrade.
The latency problem: Digital processing takes time. Most digital NV systems introduce 30–100ms of lag between target movement and what you see on the display. For observing wildlife from a blind, that’s irrelevant. For any situation where split-second timing matters, it’s a serious issue. Analog IIT latency is negligible.
The illuminator problem: Digital NV in low light almost always requires an active IR illuminator. That illuminator broadcasts your position to anyone else using NV. Gen 3 analog IIT can operate completely passively — no illuminator, no signature.
Digital NV is viable for hunting at moderate range in typical conditions, or for range use where cost matters more than tactical capability. Brands: ATN (X-Sight 4K, ThOR), Sightmark (Wraith series), AGM (digital monoculars). Budget entry: around $200–$300. Capable hunting units: $800–$2,000.
Common myths debunked
Myth 1: “Gen 4 exists”
It doesn’t — not as a recognized category. In the early 2000s, the US Army proposed calling unfilmed Gen 3 “Gen 4.” The designation was rejected because the technology was considered fragile at the time. Auto-gating solved that fragility issue, and filmless Gen 3 became the standard — but it was never reclassified. Any product marketed as “Gen 4” is using a marketing label with no technical backing. That’s a red flag, not a feature.
Myth 2: “Higher FOM always means a better tube”
FOM is the product of SNR and resolution. A 2,200 FOM can mean high resolution with modest SNR, or high SNR with modest resolution. These perform very differently in the dark. Match the spec split to your actual use case.
Myth 3: “Gen 3 means American-made”
Gen 3 refers to the GaAs photocathode technology, not a country of origin. American Gen 3 (L3Harris, Elbit) is ITAR-restricted and unavailable for export. Chinese NNVT tubes use a different photocathode process that doesn’t achieve the same quantum efficiency. The community consensus on Chinese “Gen 3”: avoid for serious use.
Myth 4: “White phosphor is just an aesthetic preference”
It’s more than that. Black-and-white imagery gives the visual cortex more contrast information for edge detection and shape recognition. Aviation studies showed reduced eye fatigue over extended use. The improvement is measurable, not just subjective.
Myth 5: “Gen 2+ (Photonis) is much worse than Gen 3”
In extreme low light — a pitch-black forest with no moon — American Gen 3 has a clear edge. In typical nighttime outdoor conditions, top-grade Photonis 4G tubes (FOM 2,200+, gain 86,000) are competitive with mid-grade Gen 3. The gap exists; it’s just smaller than the price difference sometimes suggests.
Myth 6: “More gain is always better”
Excessive gain accelerates MCP wear and can shorten tube lifespan. L3Harris notes that high gain is “always tempered by reduced gain life due to increased stress on the tube MCP.” SuperGain tubes (100,000+ fL/fc) trade some longevity for extreme low-light performance — a deliberate trade-off, not a free upgrade.
Myth 7: “You can use tube-based NV in daylight”
Never power on an unprotected Gen 2 or Gen 3 IIT device in daylight. Sunlight will permanently damage the photocathode in seconds. Digital NV is daylight-safe. Filmless Gen 3 with auto-gating tolerates brief bright light exposure better than filmed Gen 3, but it’s not designed for daylight use.
Frequently asked questions
What does FOM actually mean when buying a device?
FOM (Figure of Merit) is calculated as SNR × center resolution. It gives you a rough sense of overall tube quality. For serious use, ask the seller for the actual tube data record (TDR) showing the SNR/lp/mm split — not just the composite number. A FOM of 2,000 with 34 SNR and 59 lp/mm performs very differently than one with 27 SNR and 74 lp/mm, especially in extreme darkness.
Is Gen 2+ (Photonis) worth buying over American Gen 3?
Depends on use case and budget. Top-grade Photonis 4G tubes close much of the gap versus mid-grade American Gen 3 in typical outdoor conditions. The difference matters most in extreme low-light environments — dense dark timber, heavily overcast nights. If you’re hunting open fields or using IR illuminators, the performance gap is less decisive. Gen 2+ tubes are not ITAR-restricted, which is why European manufacturers use them in products shipped internationally.
Should I buy thermal or night vision?
Different tools. Thermal finds warm targets — people, animals — regardless of light. It works through smoke and some fog. NV gives you optical detail: you can read a sign, identify a face, navigate terrain. Many experienced hunters run thermal for scanning and NV for identification. If budget limits you to one: thermal for predator calling and detection, NV for all-purpose night use including navigation.
Can digital NV replace analog for hunting?
For many hunting applications, yes. Digital NV is cheaper, records video, and works in a wider range of conditions when paired with a good IR illuminator. The latency (30–100ms) matters less on a stationary animal at moderate range than it would in a dynamic situation. Budget digital hunting units from ATN or Sightmark work. They’re not tactical — but most hunters aren’t running tactical.
What is auto-gating and do I need it?
Auto-gating cycles the tube power at high speed (60–1,000 Hz). This ejects positive ions before they can damage the photocathode and prevents image washout when bright lights enter the field of view — headlights, flashlights, muzzle flash. It’s required on filmless Gen 3 to compensate for the removed ion barrier. On any tube, it makes the device more durable in mixed-light environments. If you’re using NV in areas with vehicle traffic or artificial light, auto-gating is worth having.
What IR illuminator range do I actually need?
For passive Gen 3 use in open terrain with good sky exposure, you may not need one at all. In dense cover or on cloudy nights, a dedicated IR illuminator helps significantly. Most tactical IR illuminators (Mawl, DBAL, Wilcox) are rated for 100–300 meters on Gen 3. Longer-range hunting setups use higher-power spotlights in the 850nm or 940nm range, which pair well with the GaAs photocathode’s near-IR sensitivity peak.
Why does center resolution matter but edge resolution doesn’t get listed?
Edge resolution in an IIT tube is always lower — typically 40–60% of center. It’s a physical characteristic of the tube geometry. Manufacturers list center resolution because it’s the best-case number. The practical implication: fine detail at the edges of your field of view will always be softer than what’s in the center. For most observation tasks this isn’t a problem. For precision work, keep your target centered.
What to read next
- Night Vision Goggles buyer’s guide — how to choose the right NVG for your use case, with tube grade recommendations by budget
- Gen 2 vs Gen 3 — full comparison — performance data, price breakdowns, and when the upgrade is worth it
- White phosphor vs green phosphor — test results, practical differences, and who should spend the premium
- IR illuminators guide — active vs passive use, wavelength selection (850nm vs 940nm), range by application
- AGM Global Vision — thermal and digital NV lineup
- ATN — digital NV and smart scope products
- Pulsar — thermal imaging scopes and monoculars
- FLIR/Teledyne — thermal products and professional systems
- Night Vision Brands: complete directory & guide 2026
- Night vision hunting laws by state: complete guide
- Night vision for hunting: complete guide
- Thermal monoculars: buyer’s guide 2026
- Best night vision monoculars 2026