
July 16, 2026
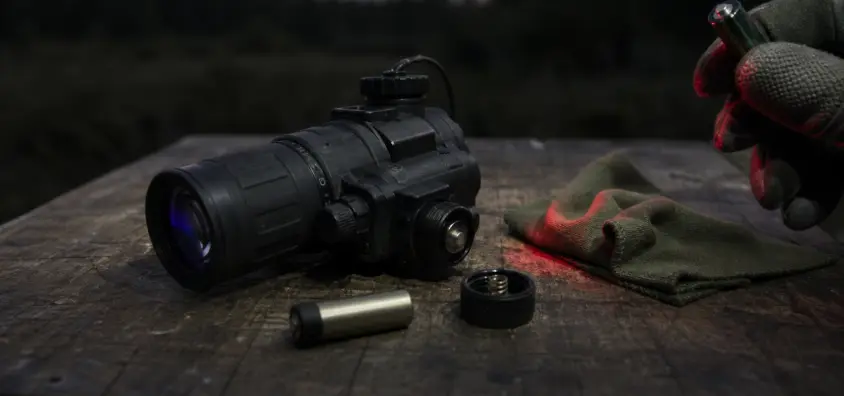
Is your NV not turning on? Battery, Contacts, Mount and Tube-Safe Troubleshooting
The short version: Safe checks before assuming the tube is dead.
If night vision isn’t working, do the simple things first. Most field failures are not explosive tube failures. This may be caused by weak batteries, incorrect polarity, dirty contacts, a cap that has not been removed, insufficient usable light, mount problems, or damage to the storage batteries.
Use this order:
- Go in to a safe area in low light.
- If you are in dark conditions, or if you have just completed a manual (capped) function check, keep the daylight or objective cap on.
- Test a battery that is known to work in the same device as you are using, with the same polarity.
- Inspect battery cap, spring, contacts and battery compartment.
- Test handheld before testing on a helmet, j-arm, bridge, rifle mount, cable, remote switch or external battery pack.
- Obtain confirmation of objective cap, lens path, focus and light conditions that can be utilized.
- STOP if there is any evidence of damage, water intrusion, heat, burning or battery leakage or suspected tube/electronics failure.
That order makes PVS-14 troubleshooting easy and minimizes the risk of causing any actual damage in troubleshooting what could be a simple problem.
When working with night vision, remember to start with safety first—don’t troubleshoot night vision like a flashlight.
Avoid Bright-Light Testing
Analog night vision is based on an image intensifier tube. Under no circumstances aim it at the sun, the headlights of a vehicle, weapon lights, lasers, bright shop lights or powerful indoor fixtures simply to test if it responds. If the device turns on abruptly during that test, you may have subjected the tube to conditions which could damage it.
Assume that the tube can still energize until demonstrated otherwise. Have the objective held and do not use the direct bright light; use the safest check provided by your manual. If you want to get a more in-depth explanation of the damage side, NV Guide USA has a separate blog post on phosphor burn and night vision tube damage.
Follow the Manual and use the Correct Daylight Cap.
For some devices capped function check is possible. Some have model specific warnings. The correct cap can have a pinhole or daylight filter, and the procedure will differ for each device. Not all PVS-14 type models operate in the same manner.
Check manual for your exact model for battery type, polarity, switch position, gain behavior and function-check procedure.
Confirm the type of device you have.
This article will primarily be on analog tube based night vision and PVS-14 type of monoculars. The behavior of digital night vision and thermal optics is different. The digital unit might be charged or firmware, screen or menu problems. Thermal optic works independently of ambient light and doesn’t require an image intensifier tube.
When your night vision device doesn’t turn on, you’re most likely using an analog model and you should use tube-safe habits. If it is a digital or thermal, follow the manufacturer path of that platform.
When your night vision battery is causing issues, it’s the first place to check.
Use a known good battery if one is available.
The most common cause of a PVS-14 battery that fails to start is due to a bad, weak, cold, old, or incorrect battery. Use a clean battery that is known to be good and of the correct type. The cell that was "probably fine" in a drawer.
The type of battery can vary from model to model. Many PVS-14 devices utilize AA batteries, and other night vision devices may employ CR123 batteries or another power system. Use only cells that fit into the cell compartment, and do not use CR123 and AA cells interchangeably unless specified in the manual.
Weak batteries are shown very easily in cold conditions. When night vision won’t turn on prior to a hunt, range night or property check, try a new battery before blaming the electronics. For planning spares, see NV Guide USA’s night vision battery life guide.
Check Battery Orientation
A polarity error occurs frequently, since it is difficult to read the small compartments in dim lighting. A bad battery can cause the device to appear as if it’s inoperative. Do not rely on your memory from another optic, check the marking in the battery compartment or the manual. Stop and check if PVS-14 Battery Compartment marking is worn before cycling the switch repeatedly.
Check the Battery Cap & Battery Contacts.
The contacts of a night vision battery are small and contact pressure is critical. Even if the battery is good, a loose power battery cap, a weak battery spring, dirty battery contacts, a cracked battery cap, damage to the battery threads or battery corrosion can disrupt power.
Inspect the cap to see if it is not tightening properly, check for bent or compressed spring, check for green or white corrosion, battery leakage, dirt on contacts, cracked plastic, or a loose battery.
Cleaning to be limited to manual and not destructive. Never gouge the contacts, strip the coating off the contacts, bend the springs out of their normal travel, pour liquid into the compartment, or use improvised abrasives. If leakage or heavy corrosion is present, STOP and contact qualified service.
Batteries don’t react well to cold weather.
If the night vision does not turn on in cold conditions, try again with a fresh battery, which should be kept warm prior to use. Check that the cap fits tightly without being too tight. Then try handheld in the simplest setup before faulting the tube.
If the Indicator Works but the Image Looks Black.
The power to one part is no indication that the tube is generating an image.
Even if an IR indicator or a tiny control light indicates that the image path is functional, this does not necessarily confirm the entire image path. It might just indicate that a portion of the circuit is powered. Divide the question: Is there power to the device, and is the tube/image path generating a viable image? That will prevent a night vision no image complaint from becoming a poor diagnosis.
Examine the Objective Cap and Lens Path.
There are several reasons for a night vision black screen, including having a cap still on the objective, the aperture is closed, a daylight filter is in place, the lens is blocked, the sacrificial lens is dirty, the glass may be fogged, or an accessory may have been placed over the front end.
Inspect lens path from outside, but not at a bright light. Check the objective cap, filter, iris, sacrificial lens, and adapters to be sure they are in the locations you think. If outside glass is fogged, dry/clean it according to the manual. Do not open the housing if you think moisture is inside.
Always be sure that the scene has light that is usable.
Analog night vision works off of the light that is available, not by making light from no light. Sealed room, dense woods under heavy overcast, windowless barn or deep shadow can appear essentially black without supplemental IR.
If your night vision IR illuminator is not working, test the illuminator independently, and determine if your device is equipped with onboard IR, external IR or not at all. NV Guide USA’s IR illuminator guide provides an explanation on why very dark environments may require additional IR.
Before assuming the mount is bad, test the Device Handheld.
To remove the Device from the helmet or rifle setup, follow these steps:
Simplify the system. If the manual specifies that handheld testing is possible, then take the monocular out of the helmet, J-arm, bridge, weapon mount, remote switch, external battery pack and cable. Try using the proper internal battery initially.
Failure of a night vision monocular on a helmet does not necessarily indicate that the monocular is broken; it could be a simple problem. If it does, the problem is likely to be in the mount, power accessory, switch interface, cable or setting of the device.
Mount or J-Arm Shutoff Issues.
Sometimes a device can only shut off or fail when it is mounted because of loose interfaces, pressure on controls, worn lockup, damaged cable, unstable bridges, or intermittent external power. Test to see if the device turns off when flipped up, lowered, tilted head, pressed into the eye piece or moved around with cable attached.
Maintain the inspection on the outside and at the user-level. Never ignore safeties, adjust switches, file parts or force lock up. For basic setups, follow NV Guide USA’s night vision helmet setup guide.
Reintroduce external power one at a time.
Failure points are added with external battery packs. Try the internal battery first, then the cable, then the pack, then the mounted. When the device is not working on the external power but is working when plugged into the device, the issue is likely the pack, cable, connector, setting, or compatibility.
Sometimes the "Won’t Turn On" problem is actually a problem with the focus, light or setup.
A working device can appear useless when the diopter and objective focus setting is involved.
A working tube may appear to be of no value if the diopter setting is badly off or if the objective focus position is not set to the correct distance. This soft gray appearance is often touted by novices as "night vision doesn’t work."
Diopter will be used to adjust the eyepiece to your eye. Objective focus is used to set the scene distance. When the system is powered on and if nothing is sharp, try NV Guide USA’s night vision focus guide rather than assuming a hardware failure!
Grain, scintillation, and weak light are not the same as no power.
Grain and scintillation typically indicate that the tube is operating in low light. This is not no power. Manual gain (if available) can also cause the image to be too dark or too light. The NV Guide USA blog’s manual gain night vision guide provides a guide to the control in normal use.
The position of a helmet can obscure a usable image.
Eye relief, height, tilt and fore/aft position is important. The eyepiece may not be positioned within sight of your pupil and hence you’d see a partial image, a lot of vignetting, a black edge or nothing useful. Even when the PVS-14 is generating an image, it can seem like a PVS-14 black image.
Handheld vs Helmet mounted viewing. Adjust the helmet, mount, J-arm and eye position if it is working without handheld and not working with helmet.
After months of storage, the device experienced issues with storage.
Battery Leakage and Contact Corrosion
Leaks are also possible during storage, leading to contact damage. Check the compartment and cap prior to putting a new cell in place before a season or class. Take batteries out of the product for storage unless instructed to do otherwise by the manufacturer. NV Guide USA has information on storage habits at how to transport and store night vision gear.
Water, condensation and seal issues.
Outside fog is one thing. Different is internal fog (droplets in the optical path), corrosion or indications of water intrusion. Never open a sealed device for drying purposes. Stop at safe external examination if device has been exposed to rain, dunking, heavy condensation or flooding and will not power on. Why seals and ratings are important is explained in NV Guide USA’s night vision waterproofing guide.
The settings and accessories available to the user are forgotten.
Post storage check: caps/filters/gain/remote switches/external cables/iris/sacrificial lenses/mount position. We may have left an accessory from the previous range night, and when using it on the next night it may appear as if it was ineffective.
There are times when you need to call service rather than troubleshooting.
Smell of heat or burn, visible damage, water intrusion.
Cease operation when a cracked housing, crushed cap, damaged battery compartment, leaking battery residue, water in the device, unusual heat, smoke or a burn odor is detected. Don’t rotate the switch or change the batteries to "wake it up." Reach out to the manufacturer, dealer or a reputable night vision service provider.
Suspected Tube Damage or Burn-In
Damage to the night vision tube is not the same as a battery problem. If the tube is damaged, it can present with any of the following: persistent burns, streaking, bright spots, shadows, or other image issues upon powering. Also, image blemishes are not a sign of deadness. When it comes to artifacts, check out NV Guide USA’s night vision blemishes and black spots article. Use the tube damage guide for damage risk.
Battery fully charged with no contact issues, but repeated shutoff.
If tests have been performed with a known good battery, correct battery polarity, snug cap, clean contacts, and simple handheld testing, then the problem may be with the cap, contacts, switch, power supply, electronics or another internal component. That’s where analog night vision troubleshooting should stop being service, and start being guesswork.
Often the same mistakes are the ones that exacerbate the issue.
The test was carried out under bright indoor lights.
Color light sources, inside and out, are a no-go for analog night vision. The safe function check can only be performed by using the manual-supported safe function check.
Scraping Contacts Aggressively
Excessive scraping may strip plating or embed debris, or bend parts. If there is no contact after gentle manual-approved cleaning, stop.
Opening a Sealed Device
Never open a sealed night vision device to check the tube, power supply, purge, wiring or internal contacts. The proper tools, parts, and conditions are needed to achieve internal work.
Do not assume you need to replace the tube if all the images are black.
A black image may be caused by battery, polarity, cap, contacts, blocked lens, no ambient light, focus/gain, helmet position, mount, cable, corrosion, moisture or true electronics failure. Diagnose in order.
Before a hunt or training night, a quick field checklist of the following items should be done.
- Correctly installed fresh battery.
- Spare battery packed.
- Battery cap snug.
- Lens Caps, Daylight Cap, Filters and Iris checked.
- The Device has been tested in safe low-light conditions.
- Focus and diopter up close for the distance.
- Separate IR Illuminator tested if required.
- Mount, J-arm or bridge mounts or weapon mount have been tested for stability.
- External power cable/pack tested, if applicable.
- Moisture check for storage case.
- Stop-and-service signs understood.
Bottom Line
Don’t assume that if your night vision does not turn on, it is "dead tube." Start with the basic to the more complicated: battery, polarity, cap, contacts, lens path, usable light, focus, mount, storage condition, external power. Avoid bright light on analog tubes, follow the manual, and stop if it looks like it’s broken or has something inside it.
It is not about being a repair tech in the field. The aim is to distinguish between user-level issues which can be resolved at their own level as opposed to those issues which require qualified service.
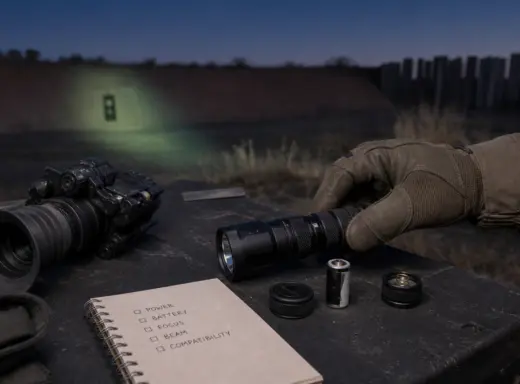
IR Illuminator Not Working With Night Vision? Beam, Battery, Focus and Compatibility Check.
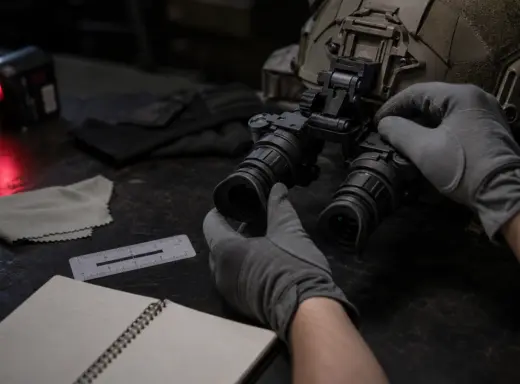
Night Vision Collimation and Alignment: Fix Double Vision, Eye Strain and Dual-Tube Setup Issues

PVS-14 Depth Perception: How to Move Safely With Monocular Night Vision