
June 30, 2026
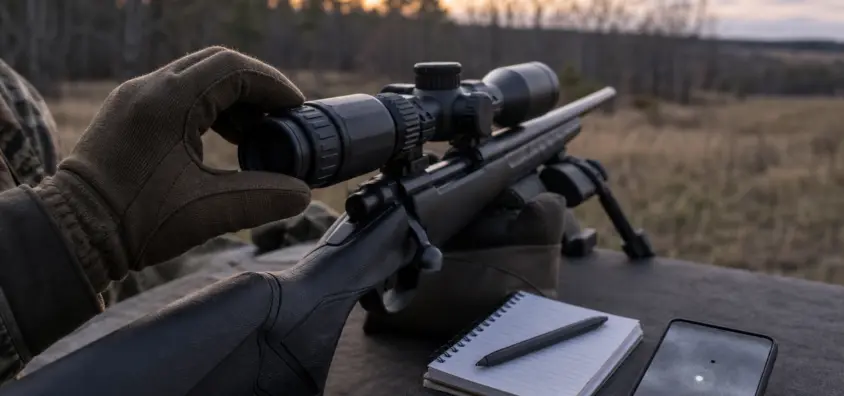
Thermal Scope Dead Pixels, Stuck Pixels, and Screen Artifacts: What to Check Before Calling Support.
That bright dot that’s in the reticle can creep in your head quickly. Same with a black speck that never moves, a faint line, a ghost shape after scanning a hot object or a flicker before a hunt. The initial thought that comes to mind is simple: is the scope defective?
Maybe. However, "dead pixels" is not the same as "dots" and "artifacts" are not the same as "optics return." A thermal scope is comprised of a sensor, display, processor, lens system, firmware package, pixel map, battery system and menu interface. Multiple sources can be the cause of the problem.
This is a guide for hunters and thermal scope owners that need a step-by-step process before calling support. If the optic is attached to a rifle, ensure that the rifle is safe prior to inspecting the optic, doing menu work, phone recording, cleaning the lens, changing batteries, or checking apps. Maintain control of the muzzle and don’t let a screen be a distraction in identifying a target or making a backstop judgement.
To browse more guides in this cluster, visit NV Guide USA’s Thermal Scopes & Imaging section.
The Short Version
For thermal scope dead pixels, stuck thermal scope pixel or any other thermal scope screen artifacts, follow this order:
- Make rifle safe.
- Identify the symptom: bright dot, black dot, line, ghost image, frozen cluster, flicker or uneven pattern.
- Test lens, eyepiece, focus, display brightness, palette and base magnification.
- Perform NUC/calibration as per the manual.
- Perform the same test with the same artifact in multiple scenes.
- See if it is recorded on a video if the artifact is present.
- Only use the official model-specific pixel defect correction procedure/pixel repair procedure.
- Refrain from using a random reset code, unofficial firmware, heat, impact, disassembly, tapping, freezing, or Internet repair tricks.
- If artifact exists, report it and call official help.
First: Describe What You Are Seeing
Do this prior to changing settings. Hot dot, black dot, line and ghost image are different issues.
A Bright White Dot That Never Moves
A bright spot on screen seen by a thermal scope might be a stuck or hot pixel, but also check to be sure that the bright spot is not real scene detail. A small point may be a star, a light in the distance, an insect in front of the lens, a hot piece of debris, shiny objects or a warm rock.
Move the camera over a safe situation. If the dot tracks the scene, then it is likely a true heat source. However, if it remains focused at the same screen position, it’s more likely to be in the image pipeline or display path.
A Black Dot or Cold Pixel
A thermal scope black spot on screen is frequently seen in relation to a uniform sky, wall, field edge or warm animal body. Try out multiple backgrounds. Consider it repeatable evidence if it remains stationary with respect to sky, ground, brush and wall.
Lines, Columns, or Fixed Patterns
Fixed-pattern noise, calibration behavior and display faults can all produce vertical lines, horizontal lines, repeated strips, or grid-like patterns; this may also be a sign of a more serious thermal scope display issue. After proper thermal scope NUC calibration, some thermal scope image artifacts go away. Others do not.
The timing matters. An image that looks stale, following a long scan, is not the same as a line which is seen each time the optic is powered on.
Ghost Image or Burned-In Looking Shape
Thermal scope ghosting may occur when a large heat source has been looked at or when conditions change rapidly. May notice a vague outline or shadow not in the scene. NUC often helps with temporary ghosting. In the event that the calibration and scene changes leave the same shape, document it.
Menu/Reticle Artifact vs Thermal Image Artifact
If safe, open a menu. If the dot, line, or flicker is over menus, icons, and reticle, it could be display-side. If the artifact is found in the thermal scene, but the menus are clean, it could be a sensor-side or processing-side artifact.
Rule Out Simple Image Problems First
Don’t begin with repairing pixels. Do the most time consuming field problems first.
Check Lens, Cap, Fog, Dirt, and Eyepiece
Once you’ve made the rifle safe, check the objective cap, front lens, eyepiece, eyecup, display-side surface and covers. Other causes of false dots, haze, rings or soft spots include dew, dried rain, fingerprints, dust, mud film and eyepiece smears.
NEVER dry-wipe grit over a thermal objective lens. There are lots of thermal lenses and coatings that require careful handling. Follow manufacturer’s instructions and NV Guide USA’s cleaning and maintenance guide for thermal scopes.
If the image is milky, or soft looking, check the guide on thermal scope fogging, condensation, dew, and cold-weather fixes.
Adjust Diopter and Objective Focus Properly
If the menu text and reticle are not clear, first adjust the diopter. Use the objective focus for the real distance if the reticle is sharp, and the scene is soft. The noise from the sensor can be more noticeable in a shot that is not shot with a lot of focus. To properly focus the thermal scope, refer to how to focus a thermal scope.
Return to Base Magnification
Digital zoom magnifies the pixels, noise, sharpening halos, compression and small defects. A speck that is not visible at base magnification may look unsightly at 4x digital zoom. Judge base magnification first.
White Hot, Black Hot, and a Neutral Palette: What are the differences?
Some artifacts show hard in white hot and are barely visible in black hot. Determine which color palette is the best by comparing the same scene at same focus and magnification in white hot, black hot, and one neutral palette.
Run NUC / Calibration the Right Way
NUC is an acronym for non-uniformity correction. In field language, it helps the scope update the "translation" of sensor response to a clean image. Click, shutter, pause, freeze, or manual calibration are some of the indications that many owners may notice during this process. This is explained in this article by NV Guide USA entitled Thermal NUC Explained: Why Your Scope Clicks.
What NUC Can Fix
NUC can correct for uneven backgrounds, thermal scope fixed pattern noise, temporary ghosting, stale image behavior and image drift after a change in temperature. Proper calibration is a good first step if a mark appears after a vehicle, feeder, or hot ground is scanned.
What NUC Cannot Fix
NUC will not clean a lens, fix the focus, repair impact damage, dry internal moisture, solve wet storage, or guarantee removal of a true thermal scope defective pixel. If it is still the same bright or black pixel after normal calibration, skip to the next step.
Manual NUC vs Auto NUC During Testing
Auto NUC can be used in real use. If your model permits it, and it is helpful in testing, you can calibrate manually and use controlled manual calibration. Make comparisons of the same scene before and after. Never do this with a loaded rifle behind you.
Lens-Cover Calibration on Some Models
Some devices have a “lens cap” or a “lens reference step.” Others have an inbuilt shutter. Do exactly as in the manual for your model. Never duplicate a cap-on or cap-off routine from another brand.
Pixel Repair / Defective Pixel Correction Menus
Thermal scope pixel repair/thermal scope bad pixel correction/defective pixel repair is a feature provided by many thermal scopes. Typically the function is "mapped" around a non-functional pixel so the processor can compensate. It does not fix the sensor physically, and not all the marks are considered to be thermal scope sensor defects.
Use the Exact Model Manual
Avoid universal button combinations. Different brands have different menu, apps, firmware terms and support paths such as Pulsar, ATN, AGM, InfiRay/iRayUSA, HIKMICRO, Sightmark etc.
When looking for Pulsar defective pixel repair, HIKMICRO thermal scope pixel correction, InfiRay thermal scope pixel issue, ATN thermal scope screen problem or any AGM thermal scope display issue, refer to the official manual, app or support page for the specific model and firmware.
Do Not Overuse Pixel Repair
Repairing pixels should NOT be a nervous habit. Avoid using it to look for specks moving in the field of view or insects, stars, grain or noises from humidity, or transitory artifacts. The optimum order is lens, then focus, then base zoom, then palette, then NUC and then scene comparison, and then if it’s available, official pixel repair.
After Pixel Repair: Recheck in Different Scenes
After official pixel repair, test against a wall or sky, ground, vegetation, brush and real hunting ranges. Apply simple palettes and base magnification. If it is still the same, record it.
Firmware, App and Recording Checks
Firmware may impact image processing, calibration, pixel maps, recording, menus and app workflows. That puts it into perspective, but no messing around with firmware in the field!
Only update using official tools and files. Avoid installing unofficial firmware, random recovery files or forum downloads. Do not try to use undocumented combinations of buttons if an update does not work; contact official support instead. If you have an app problem, check out NV Guide USA’s thermal scope app and firmware connection guide.
If your scope has onboard video save a short sample if it is safe to do so. If the artifact does appear in the recorded thermal footage, then it is likely in the sensor or processing path. If it looks as though the recording is trouble-free and the eyepiece presents the problem, it might be a display or eyepiece problem. For details on recording basics, check out thermal scope video recording.
Don’t do pre-hunt firmware experiments. Update at home or on a range day, with time to check menus, zero profile, recording, NUC behavior, image behavior.
When It Is Probably Not a Pixel Defect
Many "bad pixel" issues are actually image-quality issues. When the entire picture does not appear to be correct, refer to NV Guide USA’s Thermal Scope Image Quality Problems article.
Haze, soft spots, rings and false marks can occur due to moisture, fog, and lens film. Artifacts may be more noticeable due to low thermal contrast, humidity, wet vegetation and warm ground. Normal noise can look defective with use of digital zoom and high sharpness.
Limits of the hardware matter as well. The difference between sensor resolution and display resolution is that sensor resolution is the resolution that you capture and display resolution is the resolution that your eye sees. To put into perspective, read thermal sensor resolution and thermal scope display resolution.
When to Stop Troubleshooting and Call Support
If a bright or black pixel remains stationary near the reticle after a proper NUC, base magnification testing, comparison with a palette, scene change and official pixel correction (if available), stop and contact support. It is dependent on the model, age, location, pixel count, tolerance and support policy whether it turns into a thermal scope warranty issue.
Escalate lines, growing clusters, spreading dark areas, repeated columns, or artifacts that obstruct identification, or problems after impact, water exposure, battery leakage, failed firmware update, or power off during update. If the menus, icons, reticle and image are all impacted, state it.
Never take the optic apart. Never heat, freeze, tap, open, pour anything into it, or attempt improvised repair.
What to Document Before Contacting Support
Good notes reduce support:
- Brand, model, serial number, firmware version and version of app if applicable.
- Battery type, external power source, recent charging and disruption of power.
- Exposure to rain/fog, transportation, impact, wet storage, or recoil event.
- If the artefact is still visible on screen after NUC, palette changes, base magnification checks and scene changes.
- Video recordings of the artifact, if any, to determine if the same artifact can be seen in the video.
- If the menu text, icons, and reticle are affected or not.
- Any official pixel repair and/or support-guided steps you already attempted.
Take pictures or videos only when it’s safe to do so. A photo through the eyepiece taken with a cell phone can be helpful, but it’s not worth the risk of handling the rifle.
Thermal Scope Dead Pixels and Artifacts Field Checklist
- Safety: Make the rifle safe.
- Name the artifact.
- Inspect lens, cap, eyepiece, focus and display fundamentals.
- Back to base magnification.
- Make a comparison between white hot, black hot and a neutral palette.
- Perform NUC/calibration as per the manual.
- Try it out in multiple scenes.
- Only use official pixel repair when indicated in the manual.
- Review recordings to see if they exhibit the same artifact.
- Document model, firmware/conditions and evidence.
- If the problem still occurs or after an impact, when the water has been exposed or due to failure of the firmware, stop.
- Get in touch with official support with documentation.
Quick FAQ
Are "Dead Pixels" normal on a thermal scope?
Thermal imaging devices can have a few non-functional pixels, but this will vary from manufacturer to manufacturer and depend on the model. Never take anything for granted when it comes to dots, and never assume that the dot is a warranty failure.
Stuck Pixel can be solved by NUC?
In some instances NUC removes ghosting, fixed-pattern noise, or temporary artefacts. If it’s a real defect, you might have to use a repair function specific for that model, or official support.
Bright dot only in Digital zoom.
Digital zoom amplifies the existing sensor pixels, display pixels, sharpening and noise. Before assuming that the scope is defective, check the artifact at base magnification.
If my thermal scope has a black dot, is it a warranty problem?
It depends on persistence, location, number, model tolerance, age and official bad pixel correction, whether or not that fixes it. Note the symptom and inquire with the manufacturer as to whether or not it persists.
When’s the right time to reset my thermal scope to factory reset?
Follow the reset procedure provided by the manufacturer of the model you have. Avoid forum button combos, undocumented recovery steps, or random reset codes.
Can firmware cause screen artifacts?
Firmware can impact image processing, calibration function, pixel maps, recording and menus. Changes should be made in the official process, and tested at home.
Final Field Rule
Screen artifact does not mean failure, it means slow down. The order of work is: safety, name of symptom, basics of lenses/focus/displays, base magnification, palette comparison, NUC, official pixel repair (if possible), documentation, and support.
Don’t be distracted by a dot, line or ghost image from the more important aspects of thermal hunting: muzzle control, safe backstop, thermal target identification and field judgment.
IR Illuminator Not Working With Night Vision? Beam, Battery, Focus and Compatibility Check.
Is your NV not turning on? Battery, Contacts, Mount and Tube-Safe Troubleshooting
Night Vision Collimation and Alignment: Fix Double Vision, Eye Strain and Dual-Tube Setup Issues