
June 22, 2026
Poor Thermal Scope Image Quality: Blurry, Grainy, Washed Out or Low Contrast
The Short Version
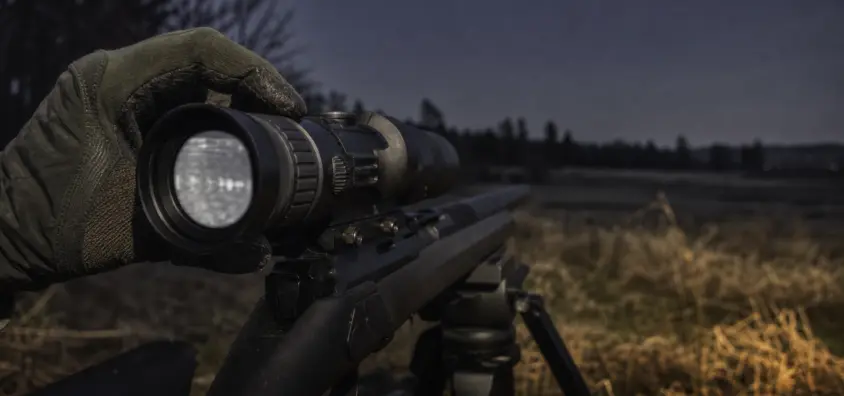
If you are having thermal scope image quality issues, it is most likely due to the way you are setting up, the conditions, or your expectations of the image quality. One question I always ask when a hunter tells me a thermal scope image looks bad is this: What does bad look like? Four problems are a blurry image, a grainy image, washed-out image, and ID detail problem. They don’t share the same bug-fix.
The order of fields I use before I point fingers at the scope:
- First, make sure that the lens cap, dirty lens, eyepiece, brightness, and display are all checked.
- Adjust diopter to fit your eye before objective focus.
- Adjust objective for true target distance.
- If the image is uneven, smeared or stale, run NUC or calibration.
- Set the gain, contrast, brightness and sharpness to sensible settings.
- Use a different palette, but don’t rely on a palette to give you detail where there is none.
- Take into account humidity, fog, rain, warm ground and thermal crossover.
- Zoom out of digital zoom and evaluate the image at original magnification.
- Distinguish between defects and wear.
That order addresses more "thermal scope image looks bad" complaints than any one setting change. It also helps you not to be chasing the wrong problem in the dark.
Assign the problem the right name.
Thermal optics are not night vision cameras. They aren’t as detailed as a daytime optic with regard to fur texture, grass blades, or face detail. Thermal scope is a device which converts heat contrast into an image. If the contrast is low, the setup is wrong or the optic is being abused, the picture can quickly disintegrate.
Put the complaint in any of these buckets first, before making any changes.
Blurry Image: Soft Edges or Wrong Focus
To answer the question "Why is my thermal scope blurry?" simply take a look at the borders of solid items. Use fence posts, tree trunks, rocks, cattle panels, rooflines and feeder legs for testing. A blurry image in a thermal scope is typically found on animals, but also around other objects in the image, as the edges would be soft.
Common causes include:
- Wrong diopter prescription for the eye.
- Objective focus set at incorrect distance.
- Lens cap is not fully open or lens has dirt on it.
- Zoom on the screen which enlarges the pixels.
- Display brightness or sharpness taken too far.
- Effects of heat shimmer or atmosphere that decrease apparent detail.
A helpful hint: If the reticle is clear but the target is not – the eyepiece/diopter is probably close enough and the objective focus, distance or conditions should be examined. If reticle and menu text are not clear, begin with the diopter.
Grainy or Noisy Image: Sparkle, Crawling Noise, or Harsh Processing
A grainy image captured with a thermal scope resembles crawling specks, sparkle, salt and pepper, or aggressive edge processing. A certain amount of noise is acceptable, particularly in less contrasty scenes. The problem occurs when the image is "busy" enough that you can’t find the animal in the background.
Low thermal contrast, high gain, high sharpness, digital zoom, small targets at distance, sensor limitations are all possibilities for grain. It can also appear worse when comparing footage shot in scope conditions to the nice video clips they have in their library, shot under better conditions.
Washed-Out Image – Low Thermal Contrast / Humid Conditions
A washed out thermal scope picture will have low contrast and separation between the animal, ground, brush and sky. Everything in the entire scene might appear gray, flat or milky. Some people refer to this as thermal scope low contrast.
The scope could be OK. There are many factors that can affect the contrast that your optic can present, such as humidity, fog, drizzle, warm vegetation, thermal crossover, etc. Settings are there to allow you to "make the best of a bad situation," but they can’t create a strong heat difference that isn’t there.
Poor Identification Detail: Detection is not the same as Positive ID
This is the most crucial difference in the industry. An animal can be detected by a thermal scope long before you get enough detail to make a positive identification. Detection is a bright blob at 300 yards. Sometimes recognition can be achieved by shape, movement, behaviour, size and context. Positive ID is when you feel sure when you know what the object is and what lies behind it.
Thermal scope poor identification too often is a focus and/or settings problem but many times it is a range, a magnification, sensor, lens or a weather problem. A hot signature shouldn’t be pressuring you into a shot. Obey local laws, check the target and check the backstop.
Ensure that there are no problems with the lens, cap, eyepiece, or display basics.
Do the basics first since they are the ones that waste the most time if not done.
Make sure the objective cap is completely open. In some flip caps, a partially draped cap may obscure part of the lens, resulting in a dim or chopped image, or strange softness. Next inspect front lens for fingerprints, mud mist, dried rain spots, dust or condensation. Clean lenses with proper lens-safe cleaning methods NOT shirt sleeve or paper towel. The cleaning and maintenance guide is the proper internal source to assist with this step: https://nvguideusa.com/blog/how-to-clean-maintain-thermal-scope/
Then, check the eyepiece and display. If the menu text, icons and reticule is not easy to read, it is not a thermal image problem; it is an eyepiece problem. If the screen is getting in the way of seeing in the dark, turn the brightness down. After your eyes adjust to night vision, a screen that’s too bright can cause a usable thermal image to appear washed out.
Do this prior to making advanced changes. Without the correct physical configuration, each menu change is a shot in the dark.
Step 2: Set Diopter before Objective focus
The diopter is used to adjust the eyepiece to your eye. The objective focus is used to correct the thermal image for distance. One of the most frequent "focusing" issues I encounter with new owners is mixing those two up.
Use this order:
- Use a safe background without patterns or stripes.
- Display the menu or check the reticle.
- Fine-tune the diopter so that the menu text and reticle are clear.
- Do not adjust the diopter unless your eye, prescription or viewing setup changes.
- Now point out the objective to the target distance.
Don’t continue turning the diopter if the reticle is clear but the object is not. Refocus the objective. The natural internal link is the thermal scope focus guide, which can be found here: https://nvguideusa.com/blog/how-to-focus-a-thermal-scope/
When I am in the field I prefer to pick on one or more of the following on the ground around the same height as the animal: a post, tree line, rock edge, feeder leg or brush edge. Paying attention to open ground may be misleading as there may not be enough thermal detail to determine sharpness.
Step 3: Run NUC or Calibration When the Image is Uneven
NUC is the acronym for non-uniformity correction. Thermal scope NUC calibration helps the scope to "redraw" the NUC map. Depending on the scope’s design and settings, many scopes click, pause, shutter, freeze briefly or even require a lens-cover calibration. Specific wordings may differ according to manufacturers and should be verified prior to publication.
When to run NUC or calibration:
- Picture appears blurred or uneven.
- There appears to be a ghosted shape in the scene.
- The image "suddenly" appears "dated" after temperature shift.
- Background is patterned noise which does not clear with settings.
- The scope has been in use for some time and the image has gradually been degraded.
NUC can’t correct for bad focus, rain, unrealistic digital zoom or dirty lens. It is one step in the process, and not a magic reset. The closest internal link that works is https://nvguideusa.com/blog/thermal-nuc-explained-why-your-scope-clicks/
Step 4: Make Adjustments in the Right Order
Although the thermal scope image settings are powerful, they can cause a good picture to be ruined if settings are used randomly. I like to adjust these settings in this order: brightness, contrast/gain and then sharpness.
Brightness adjusts to make the screen more bright or dim to your eyes. If too low, then you lose detail. High levels may cause the screen to appear milky or cause eye fatigue during nighttime viewing.
Separation in the image is influenced by contrast and gain. Increasing the contrast will help animals spring off the page, but extreme levels may flatten out the detail. Increased gain may increase or reveal low signals, but may also increase noise. That is, thermal scope contrast and gain should be adjusted hand in hand, rather than two separate knobs.
The sharpness could enhance edges, but if it is set too high, high thermal scope sharpness setting values can emphasize grain and make brush, grass and background texture appear coarse. Before pointing fingers at the sensor, if the image is crunchy or outlined, lower the sharpness.
The practical field rule is "one change per object," meaning only one change should be made at a time and the object observed, and at least a few seconds allowed for the eye to make a judgment. If lost, switch back to default or a known profile and build back up. To get a more detailed explanation of settings, read this article: https://nvguideusa.com/blog/thermal-scope-settings-explained-gain-contrast-brightness-sharpness-zeroing-profiles/
At the forefront of this lesson is the idea of using Palettes as tools and not as magic fixes.
Colors palettes alter the heat information display. They are not sensors themselves that add to the resolution of the sensor nor do they enhance the focus nor do they make a poor thermal scene into a good one.
In most cases, the most practical starting points will be white hot or black hot. They maintain an uncomplicated image and support your eye to assess shape and movement. Palettes of colors can be helpful when scanning, for comfort, or for emphasizing heat differences, but can also detract from fine identification detail.
When looking to resolve thermal scope image issues, clear test palettes in this manner:
- Use white hot or black hot as baseline.
- Only switch palette after focus, NUC and basic settings.
- Judge the same object at the same distance.
- Select the palette with the greatest separation with minimum eye strain.
If you need a detailed explanation of each color on a palette, visit https://nvguideusa.com/blog/thermal-color-palettes-explained/
Before pointing the finger at the scope, check for weather and thermal crossover.
There are just some nights that are just hard for thermal. Air humidity can cause a decrease in the quality of the thermal scope images when moisture in the air weakens the contrast and decreases the details. Fog, drizzle, wet brush and rain can flatten the whole scene. Ground and vegetation temperature can also interfere with animal heat signatures, particularly following days with sunshine.
Another frequent cause of poor performance of a good optic is thermal crossover. It occurs when objects in the environment get closer together in terms of temperature, thus minimizing the contrast that the scope will be able to show. A field, brush line, tree trunk and animal may not be as distinct during those windows as they were earlier or later in the night. When someone is looking for a flat looking evening sit thermal scope issues, this is typically what they are attempting to comprehend.
It is important to have expectation control. While weather and thermal crossover may provide a hard limit on image quality, settings can improve usability. If the image was great one night when it was cold and dry and bad one night when it was cold and wet and temperature equalized, then that’s not necessarily a fault. The supporting article is internal to the NV Guide site, found at https://nvguideusa.com/blog/thermal-crossover-explained/
Step 7: Turn Off Digital Zoom and Compare at Base Zoom
Thermal scope digital zoom blurry issues are quite common because digital zoom simply amplifies the image that you already have. It doesn’t add any additional sensor detail. The more you zoom digitally, the more edges become blocky, the more noticeable the noise becomes and the less identification detail may seem like it improves, but it actually doesn’t.
Always compare the image quality at the base magnification before making an assessment of the optic. If the scope is OK at base magnification and is not really good at 4x digital zoom, it’s a limitation and not a service issue.
This is another area where video online can deceive buyers. Recordings can be made at optimum distances, under optimum weather conditions, at base magnification, or at higher spec optic. Your scope in the field must fit your sensor, lens, display, humidity, range and shooting position. To get assistance, refer to https://nvguideusa.com/blog/thermal-scope-magnification-base-vs-digital-zoom/.
Determine if a performance issue is caused by a worn gear or a setup issue.
Once focus, NUC, settings, palette, weather and digital zoom are considered, examine the hardware limits with candor.
Resolution of the sensor determines the amount of thermal information that the scope can capture. Generally, the higher the resolution of the sensor, the more pixels on target at a given FoV, however this is just a part of the whole system. Internal support: https://nvguideusa.com/blog/thermal-sensor-resolution-explained-320-384-640/
NETD is a measure of sensitivity, or the smallest temperature difference the device can detect. Although lower NETD may be of assistance in subtle contrast conditions, actual image quality in real world situations is dependent on processing, lens, display, and weather. Internal support: https://nvguideusa.com/blog/netd-explained-thermal-imaging/
The display resolution has an impact on the viewing experience of your eye through the eyepiece. Even a good sensor in a limited display can seem less detailed than you would like. Internal support: https://nvguideusa.com/blog/thermal-scope-display-resolution/
Identification distance depends on lens size, base magnification, field of view and pixel density. Yet a compact thermal can be great for scanning or close in work and not necessarily the right tool for long range identification. It’s not a failure – it’s system design.
If image quality is poor and the fault appears to be caused by the lens, it might be a real defect.
It is important to remember that most thermal scope troubleshooting shouldn’t start with a warranty claim. But, actual defects can occur.
Consider service or manufacturer support if you notice:
- Areas, lines or artifacts that persist after appropriate NUC and look ‘dead’.
- Extremely uneven images that are present in normal operating conditions and do not reset/calibrate.
- Focus controls that cannot focus at any distance.
- Moisture penetration or internal contaminants.
- A fault that occurs on a display affecting menus, reticle and image.
- Abrupt and significant image deterioration following impact, water damage or electrical failure.
Never make up a model specific diagnosis from a forum posting. Write it down, document what is observed, reset only as per the instructions in the manual, and contact the manufacturer or dealer with solid proof.
Field Troubleshooting Checklist
Looks like the image on the thermal scope is poor? Use this quick order:
- Before troubleshooting behind the rifle, check if direction is safe, check if target area is safe and check if there is a safe backstop.
- Fully open the lens cap.
- Inspect front lens condition and clean using proper lens safe techniques.
- If the screen appears too bright or milky, turn down the display brightness.
- Adjust the diopter for a clear reticle and text in the menu.
- Set the focus of the objective at the target distance.
- If the image appears uneven or stale, run NUC/calibration.
- Set brightness, contrast/gain and sharpness to moderate.
- White hot, black hot before chasing specialty palettes.
- Judge weather: humidity, fog, drizzle, wet vegetation, warm ground, crossover.
- Go back to base magnification and compare before using digital zoom.
- Determine if the problem is set-up, conditions, equipment limitations or potential equipment malfunction.
Quick FAQ
If the reticle is clear, why is the image from the thermal scope blurry?
If the reticle is clear, but the target isn’t, then the diopter is likely not the problem. Check objective focus, target distance, digital zoom, lens condition and weather conditions. This is the classic thermal scope reticle sharp target blurry situation.
How can I help to clear up a thermal scope image with speed?
When addressing a thermal scope image issue in the field the short order is: lens, diopter, objective focus, NUC, brightness, contrast/gain, sharpness, palette, weather, digital zoom. Don’t adjust 5 settings in the same time.
Why is my thermal scope giving me grainy images at night time?
Low contrast or high gain, high sharpness, digital zoom or sensor/display limits can cause a grainy image. There are some normal grains. If the image is suddenly very noisy after it has been exposed to temperature changes or after long operation, run NUC and re-evaluate.
Why is it that my thermal scope is washed out in humidity?
Useful thermal contrast can be lowered by humidity, fog, drizzle and wet vegetation. The scene can still be recognisable, but the scope will not be as detailed when detecting animals. Weather cannot be eliminated, but settings can help with presentation.
Is digital zoom a negative in thermal scope?
Digital zoom will help you to look closer at a heat signature that is detected, but it will also magnify pixels and noise. Always judge image quality at base magnification and also use digital zoom in a careful manner.
Do settings correct bad ID?
Occasionally settings do increase separation sufficiently. However, distance, target angle, target movement, weather, sensor resolution, display resolution, lens limits or excessive digital zoom can also cause poor identification. Detection does not equate with positive ID.
Final Field Rule
If thermal scope image quality issues occur, don’t automatically assume the fault is the optic, and don’t automatically test all of the menu options. Describe the issue first: blurry, grainy, washed out, poor identification. Then take them one at a time: lens, diopter, focus, NUC, settings, palette, weather, digital zoom, and gear limits.
That’s going to solve a lot of people’s complaints about blurry images with the thermal scope, and many of their problems with low contrast nights, and keep them honest about what they can and can’t see with the device. Most critical, it is used to inform decisions in the field. A thermal image is a tool for detecting and observing. Even with this, the shot needs to be confirmed for target ID, backstop, and judgment for conditions in front of the shooter.
IR Illuminator Not Working With Night Vision? Beam, Battery, Focus and Compatibility Check.
Is your NV not turning on? Battery, Contacts, Mount and Tube-Safe Troubleshooting
Night Vision Collimation and Alignment: Fix Double Vision, Eye Strain and Dual-Tube Setup Issues