
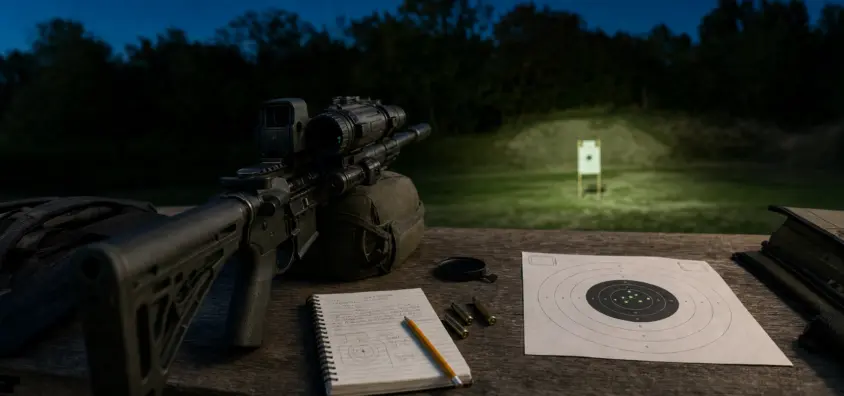
July 13, 2026
Zero Night Vision: IR Laser, Red Dot, Clip-On and Field Confirmation Guide
Many new users become too confident in the night vision zeroing. They can see through the tube, the IR dot shows up on the target, the red dot looks centered, or the clip on looks lined up with the day optic. Then the first group with the live-fire goes to another spot.
It’s not a night vision mystery. It is typically an aiming-system issue, never confirmed in writing.
Any night vision rifle setup should be viewed as a day rifle setup: the rifle mount has to be rock solid, the red dot sight has to be understood, and the point of impact has to be verified with actual shots fired under safe conditions. “Visual alignment” in the garage does not count as a zero. That’s just the beginning.
This guide covers the most typical civilian night vision configurations, including an IR aiming laser, a red dot for passive night vision aiming (via a PVS-14 or other NV device), a clip-on NV unit in front of a day optic, and a stand-alone NV scope.
The Short Version
The NV zeroing will be dependent on the setup:
- An IR aiming laser needs to be sighted in on the rifle, then tested with live fire.
- If passive aiming is to be used with a red dot, the dot should have a good daylight zero first, and then be verified for brightness, alignment, and useable shooting position through the night vision device.
- The clip-on night vision device should never be used in place of the day optic zero, however it should be checked for repeatability and point of impact shift.
- A dedicated night vision riflescope is mounted and zeroed according to the model manual.
Never take any night set-up for granted simply because "it looks right." Confirm POA and POI on target, legal range/property, safe backstop, known distance.
What "Zeroing Night Vision" Means
It’s a general term. In some cases, the user may be referring to the process of adjusting an IR laser to "zero." At times they refer to the red dot check on a monocular attached to a helmet. Sometimes it is a clip-on and they assume the day optic zero hasn’t changed.
These are separate jobs.
Zeroing the Rifle vs Zeroing the Aiming Device
The rifle has a POI with a given load, barrel, optic, mount, suppressor condition, and distance. Your day optic or red dot is zeroed when the point of aiming of your day optic or red dot is the same as the point of impact of your bullet on the distance you selected.
That relationship is not true with the night vision device. It allows only the viewing of the target and/or viewing an aiming reference at night.
An IR laser is its own aiming device. It is attached to the rifle away from the bore, usually on top or alongside the rifle. That’s an offset that will never go away. The red dot for passive aiming is different: the red dot is the aiming device, the PVS-14 allows you to only see it at night. A clip-on is another thing since many clip-ons are intended to be used in front of a zeroed day optic, yet still must be confirmed for shift and repeatability.
Relying on Night Vision to overcome a poor day zero is a poor idea.
Night vision will not save a loose mount, bad ammo match, bad rail, wandering red dot or poor rifle zero. Don’t presume the problem is with the tube, illuminator or laser before checking the essentials:
- Acceptable rifle grouping in daylight.
- There is a known optic or red dot zero.
- Rail and mounts are snug as per manufacturer’s instructions.
- The ammunition is identical to that you will use.
- Any suppressor is part of the confirmation process, if used.
The night vision point of impact will not be stable if the daylight system is not stable.
The Four Common Setups
The majority of civilian night vision zeroing questions are one of the following:
- Helmet mounted PVS-14 or binocular night vision with IR laser on rifle.
- Night Vision (Passive Aiming via red dot or holographic sight) on Helmet.
- A clip-on night vision that is attached to a day optic.
- Specialized night vision riflescope as the main optic.
If your rifle mounting question is more basic than how to set up NV, check out NV Guide USA’s guide on how to mount night vision on your rifle. If the helmet side is the issue, the night vision helmet setup guide will assist you in cleaning up mount placement, eye relief and stability.
Before shooting, conduct range checks, light checks, and legal checks.
Controlled, legal and boring: that’s how zeroing night vision should be. If it is a plan to walk out to a field at night and begin tuning a laser, then the plan is not ready.
Ensure a Safe Backstop & Range Rules.
Go to a range or private property where night shooting is permitted and the backstop is well known, and everyone involved is aware of the firing line. Firing is permitted at night for some ranges. Some limit the use of IR lasers. Some prohibit both. Know the rule BEFORE the rifle comes out of the case.
Know Your IR Laser Class and Manual
Care must be taken with IR laser alignment as it is potentially not visible to the naked eye, or even with the aid of night vision goggles. Never direct lasers at persons, vehicles, roads, aeroplane, reflective surfaces, windows or at an unknown target. Read the manual for the laser and obey the instructions for selecting modes, the procedure for adjusting the laser, and the safety limits.
It should be noted that there is a difference between an aim laser and an illuminator. If this is not clear, have a read of NV Guide USA’s breakdown of IR laser vs IR illuminator night vision.
Protect Image Intensifier Tubes
Bright light and direct laser exposure may damage analog night vision tubes. Never direct the device toward a source of light such as the sun, headlights, bright white lights, visible lasers or strong IR sources. If you still don’t know what can damage a tube, check out the blog post on phosphor burn and night vision tube damage – What is really destroying your NV gear?.
Be sure to check hunting and night shooting laws.
Night hunting laws can differ from state to state, species to species, season to season, land use to land use, light source to light source and equipment used. Legal range zero session does not equal legal field usage for game. Always check state and property regulations before using a night vision hunting setup.
IR Laser Zeroing: Converging, Parallel, and Practical Field Choices
For many helmet users the IR laser zero is the primary night vision zeroing issue. You see in the PVS-14, put the IR dot on the target, and hit the target without having to get behind a red dot or scope. That can be effective, as long as the laser is in line with the point of impact of the rifle.
What an IR Laser Zero Is
IR laser zero is the bullet to laser aiming point correlation at range. Physical offset always counts because the laser is placed above or beside the bore. You are deciding what to do with it.
Converging Zero
The laser line intersects with the bullet line at a selected point with a converging zero. Choose 50 yards for instance, and the idea is for the IR laser aiming point and the impact of the bullet to coincide at approximately that range.
The benefit is that it’s simple at the selected range. The downside is that in and beyond that distance, the relationship is different. Since the laser is not perpendicular to the bullet path, the offset may affect size, crossing, reversal or expansion depending on distance.
Parallel or Constant Offset Zero
A parallel zero is used to maintain the laser parallel to the bore or optic line, and not have it intercept the path of the bullet at a certain distance. This is referred to as a constant offset zero by some users.
Predictable holds are the benefit with this one. The problem is that the shooter has to be aware that the laser dot is not the hole made by the bullet. Both techniques are not always optimal. The correct IR laser zero is determined by the rifle, the laser location, the type of ammunition, the size of the known target, the distance the shot is likely to be taken from, and a knowledge of the shooter.
Slaving IR to a Visible Laser or Red Dot
Some laser units have a visible laser which can be “slaved” to the IR laser. If so, a visible laser IR laser zero process can be a beneficial initial alignment technique. Some users also "set" the IR laser to a known red dot zero as a starting reference point.
That is not a definitive answer. Mechanical alignment and ‘it matches the red dot’ checks can bring you close. They are not showing landing positions of bullets.
What Distance to Use?
There is no fixed IR laser distance of zero. Some of the distances that are commonly used are 25 yards, 50 yards and 100 yards but they vary depending on the type of rifle, ammunition, target and use case, and local range restrictions.
25 yards is an effective distance to check for short-range confirmation, to see if the system is mostly aligned and if offset is being understood. The 50 yard confirmation distance is a typical distance for many hunting situations and carbines. 100 yards could be part of the check for longer expected shots. The error is taking a number off the internet with no verification of what occurs at distances you will be using.
Passive Aiming With a Red Dot Through Night Vision
Passive Aiming Night Vision is aiming through a red dot or holographic sight, whilst looking through a helmet-mounted night vision device. The shooter does not project an active IR laser; instead the optic that is already in place is used.
Begin with a known Daylight Zero.
Actually a PVS-14 red dot zero is a red dot zero first. Verify red dot in daylight without night vision. Use the same rifle, mount, ammunition and height of sight you will use at night.
After daylight zero has frozen, test to see if the night vision red dot sight works. The tube is not getting re-zeroed. You are checking to see that the red dot is visible on the NV night vision device and that your shooting position allows you to aim without fighting the NV.
Brightness Settings Matter
The optic needs to be set to the right levels of night vision brightness. If it is too bright, the dot becomes a big glowing smear. You don’t want it to be too dim or you could lose it against the target. Bloom can cause an accurate zero to appear worse than it actually is, as the aiming point will appear larger than the detail of interest.
It is here that the night vision reticle types come in. A clean reticle on a scope can be too bright, too busy or too difficult to re-center under NV.
Helmet Alignment/Eye Box Issues.
Passive aiming is geometry dependent. Helmet mount position, monocular alignment, optic height, stock position & cheek weld are all required to work. In such a position, the world may be in focus but you may find it difficult to get behind the optic when the tube is set too high, too low, too far outboard, or too far away from your eye.
That’s not necessarily a zero issue. Sometimes it is a helmet setup problem! At times the optic’s height is incorrect for your system and body. If it seems like the red dot is out of focus, review how to focus night vision and ensure that the device is focused and set correctly.
Passive Aiming is not appropriate in all situations.
PVS-14 Passive Aiming is helpful, particularly in cases where you may not want to fire an active IR laser. However, it doesn’t always happen quickly and easily. Others need to have high optic mount, fixed head position and lots of practice. If the rifle is zeroed, but you have a problem obtaining a repeatable sight picture, correct the rifle geometry or select another aiming point method.
Clip-On Night Vision Zero and Point-of-Impact Shift
The day optic is the first part of a clip-on night vision zero discussion. The vast majority of clip-ons are designed to be placed in front of an existing day scope or optic that is already zeroed and the shooter will use the same reticle and zero. Not all clip-ons are zero shift-free.
The Clip-On is designed to fit on the Day Optic.
Optic is still the main aiming system of the day. The clip-on bolsters night vision in front of the device. If the day optic is good, then the day optic is good and the clip on doesn’t cause any significant amount of shift based on the distance and size of the target.
However, "supposed to" does not equal "confirmed." Quality of the model, location of mounting, stability of the rail, objective alignment, recoil, and repeatability are all factors.
Check the repeatability before you hunt.
Test point of impact with and without clip-on under safe conditions. Record the results. If you intend to do this in the field, take off the clip-on and replace it and see if the point of impact is the same.
What one user may consider a small change in their target size and distance may be OK, while it may be unacceptable to another. The important part is knowing what your system does.
Inspect for Mounting, Railing and Alignment Issues.
The most common occurrences of clip-on night vision zero shift stem from a simple mechanical issue, either from the tension of the mount, improper rail slot placement, a device not setting in the same place after being reattached, recoil movement or a weak rail/handguard setup. Never take for granted a clip-on procedure from a forum that can be used on your model. Your model’s manual controls the final setup.
Dedicated Night Vision Riflescopes
The dedicated night vision scope zero is easier to understand. The device is the main optic, so handle it as such.
If possible, treat it as Primary Optic.
Install it properly, adjust eye relief (if required by design), and zero it with live fire the same as a day optic. If your menu is digital or if you can move the reticle, follow the manufacturer’s procedure, or make the analog adjustment.
For those who are contemplating buying and are comparing platforms, the NV Guide USA article on thermal scope vs night vision rifle scope provides some context. The thermal and night vision are not zeroed and don’t behave the same.
Reticle, Focus and Illumination Checks
A dedicated scope requires a usable reticle, proper focus, stable mount and the correct brightness. When the image is soft, the reticle blooms, or the target can’t be found, the zero might not be the true issue.
Reconfirm After Mounting Changes
Recheck zero after removing the optic and moving it to another rifle and after changing ammunition, adding or removing a suppressor or changing mounts. There are normal rifle optic rules that apply to a dedicated night vision scope.
Common reasons why Night Vision Zero feels wrong.
If a night vision setup fails, the reason is most likely mundane.
Loose Mounts or J-Arms
Side to side movement: point of impact changes. Movement at the helmet alters consistency of sight and aim. The laser can be inconsistent if it is not securely attached or if the red dot moves around, due to a loose mount, a shifting red dot, a sloppy clip-on mount, a loose J-arm, or an unstable helmet. This is why night vision accessories are not just add-on accessories but part of the aiming system as well.
Laser offset was overlooked.
An IR laser mounted above and adjacent to the bore is not a centered scope reticle. If you ignore offset, especially at close distance, you can miss even when the laser appears steady.
Wrong Distance Assumption
A 25-yard zero can be off target at 100 yards. While 50 yards of confirmation is good, it does not provide all the information about 10 yards of mechanical offset. Test out the distances you will be using.
Ammo or Suppressor Change
Point of impact may vary depending on the different load, velocity and weight of the ammunition used as well as the set-up of the suppressor. If the rifle was zeroed with one load and hunted with another, the night vision system might be the culprit and be blamed for a rifle/ammo issue.
Red Dot Bloom or Tube Alignment
Blooming red spots under night vision can cause the aiming point to be less accurate. If the passive aiming tube is slightly off center, it can cause an awkward aiming experience. Both problems don’t indicate that the rifle zero changed, but can make hits more difficult.
Shift or poor repeatability in clip-on.
There are some clip-ons that are very repeatable. Others aren’t so forgiving. Point of impact shift, if the device changes position on the rail and/or is installed differently each time, can appear random.
Field Confirmation Checklist
Caution: Run a controlled checklist before using a night vision rifle setup:
- Zero rifle and day optic in daylight.
- Verify mount torque and rail position, and repeatability.
- Check battery, controls and light intensity.
- Only check IR laser alignment in a safe direction and legal location.
- Fire groups using desired distance.
- Record point of aim and point of impact.
- Check impact at the distances that are expected to be used.
- Recheck after laser, optics, mounts or clip-ons have been removed or reinstalled.
- Recheck following a change of ammunition/suppressor configuration.
- Never hunt with a setup that has not been live fire tested and has only been sighted in.
Be transparent about visibility, too. Having a "perfect zero" does not mean there is a target set for you. Detection range, target ID, weather and backstop are still relevant. If you’re trying to push the distance just because the aiming system now looks confirmed, then check out the NV guide’s blog on night vision detection range, and learn about it.
This is the best way to start by setup.
| Setup | Optimal initial strategy | What is required to be verified |
|---|---|---|
| Helmet mounted PVS-14 + IR laser | Zero laser to a practical zero, confirm with live fire. | Zero offset, mount stability, point of impact. |
| Helmet-mounted PVS-14 + red dot | Zero Red Dot in daylight, test passive aiming through night vision. | Red dot zero, red dot brightness, eye box, helmet alignment. |
| Clip-on night vision | Check day optic zero, mount clip-on, and test for shift. | Repeatability, clip-on night vision zero shift, rail and mount stability. |
| Night vision scope | Mount and zero as main scope. | Zero, reticle/focus, recoil stability. |
| New user doesn’t know how to set up | Start close on paper, then push distance | Basic grouping, safe understanding of offset, repeatable set-up. |
Final Verdict
A night vision zero is not a menu setting, a laser dot on the wall or a fast visual alignment performed in the dark. It is an established connection between the rifle, aiming device, mount, ammunition, distance and shooter.
Use a method that you know to be correct for an IR laser zero and demonstrate it on target. Passive aiming night vision: begin with a known red dot zero and ensure that the helmet and optic geometry is correct. If using clip-on night vision, verify the day optic before using it for night vision. If you are using a dedicated night vision scope, zero it as you would the main scope.
The one setup you can trust is the one that features a stable mount, a known zero, a point of impact and a realistic understanding of offset at your distances.
IR Illuminator Not Working With Night Vision? Beam, Battery, Focus and Compatibility Check.
Is your NV not turning on? Battery, Contacts, Mount and Tube-Safe Troubleshooting
Night Vision Collimation and Alignment: Fix Double Vision, Eye Strain and Dual-Tube Setup Issues